Posting content is just one part of social media marketing. Social media managers must also listen to what their audiences say, get actively involved, and respond to feedback — that's what makes brands stand out and worth connecting with. Still, managing comments is...
Redesign For multi-location brands
all your locations, one content flow
For multi-brand companies
content collaboration at scale
For agencies
impress your clients and take on more
“The team loved it from the start. Planable helps us overview the entire marketing efforts.“
Picture this, you schedule Facebook posts ahead of time, and suddenly, you’ve got all the extra time on your hands! Sounds great, isn’t it?
Assuming you have a business page on Facebook, there are two different ways to schedule your posts:
Natively – using the Meta Business Suite, or the Facebook mobile app on your phone.
Third-party scheduling tools – using a social media management tool like Planable on desktop or mobile.
Why scheduling Facebook posts is essential? Well, It helps you maintain consistency, save time, and ensures your content reaches your audience when they’re most engaged, even if you’re managing multiple social media accounts or time zones.
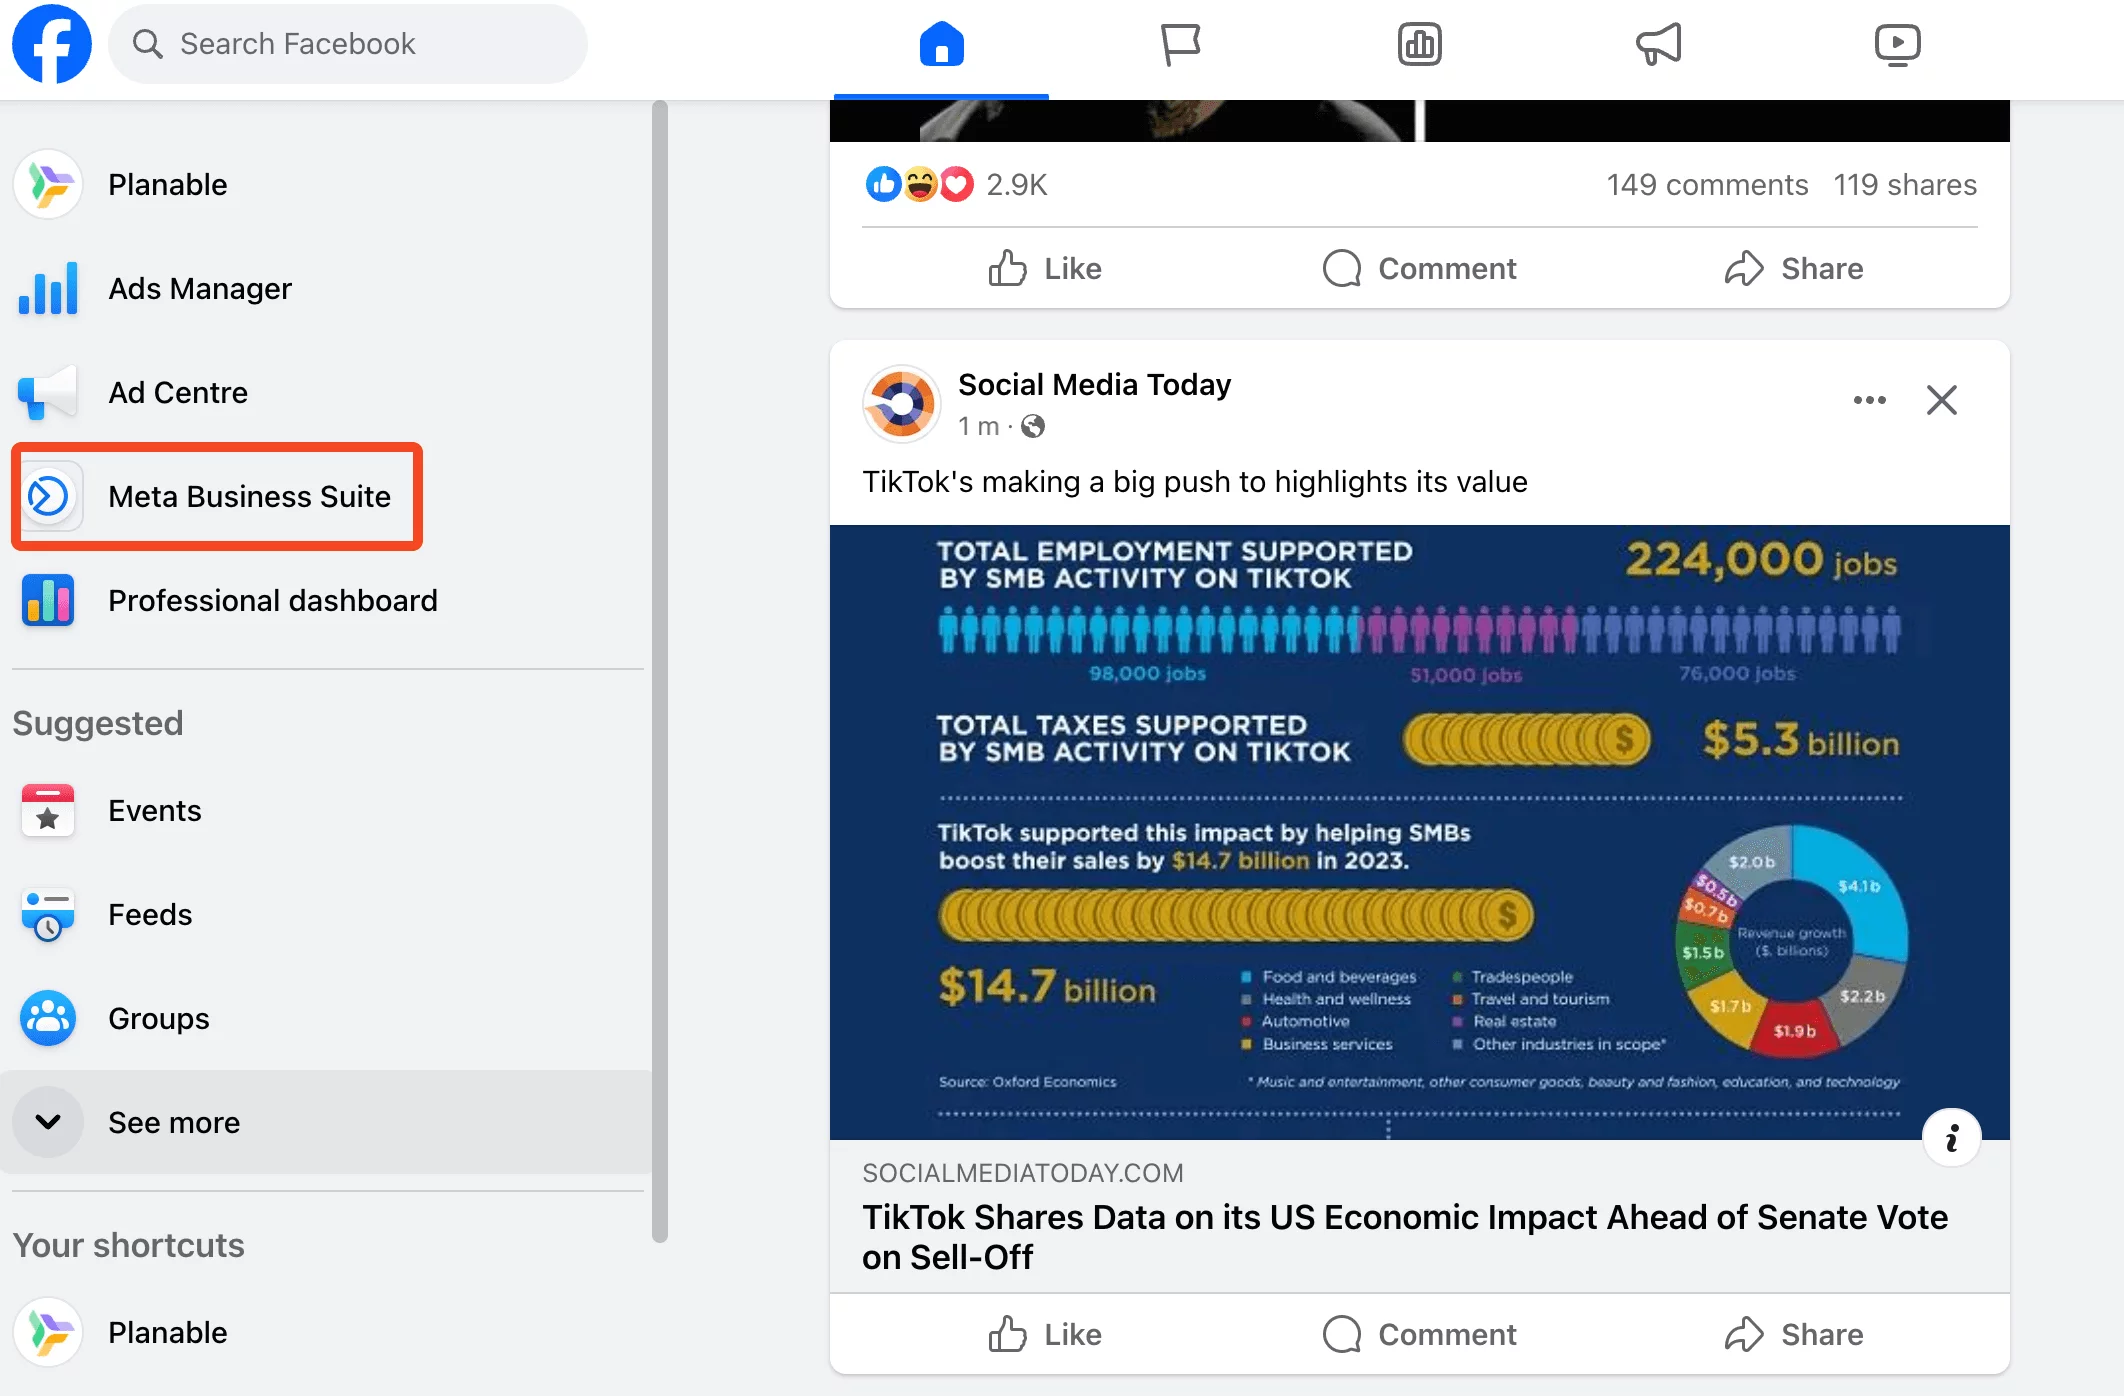
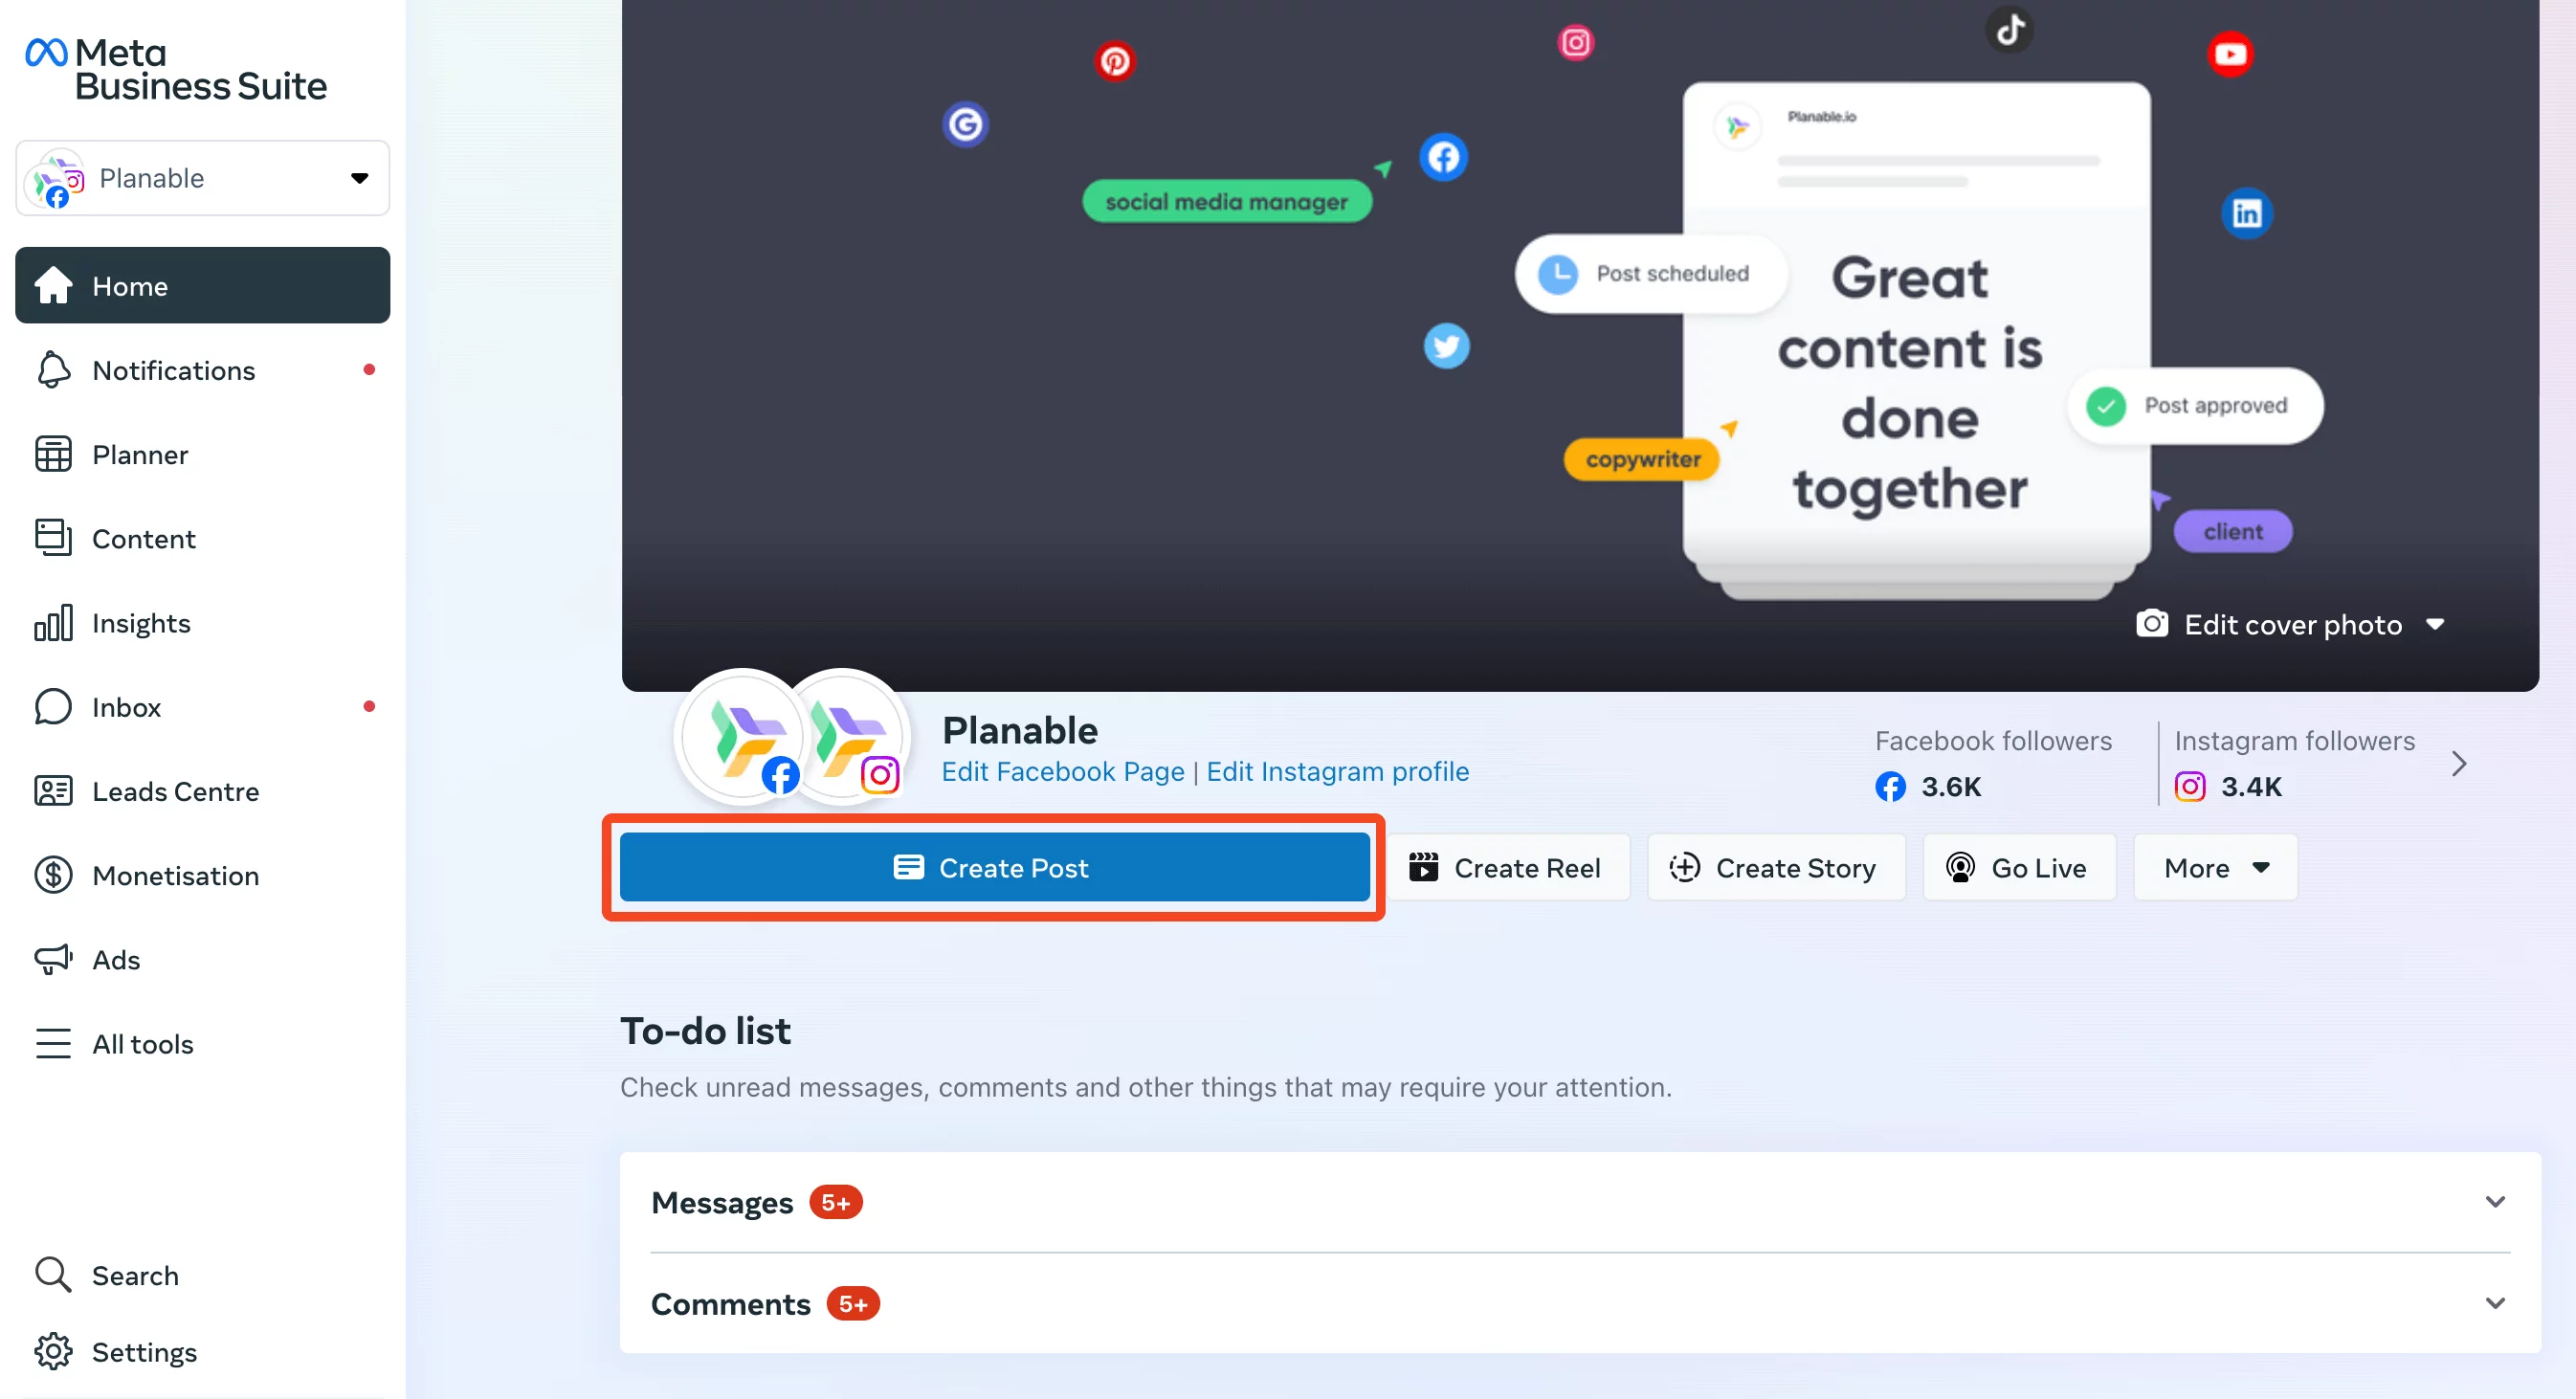
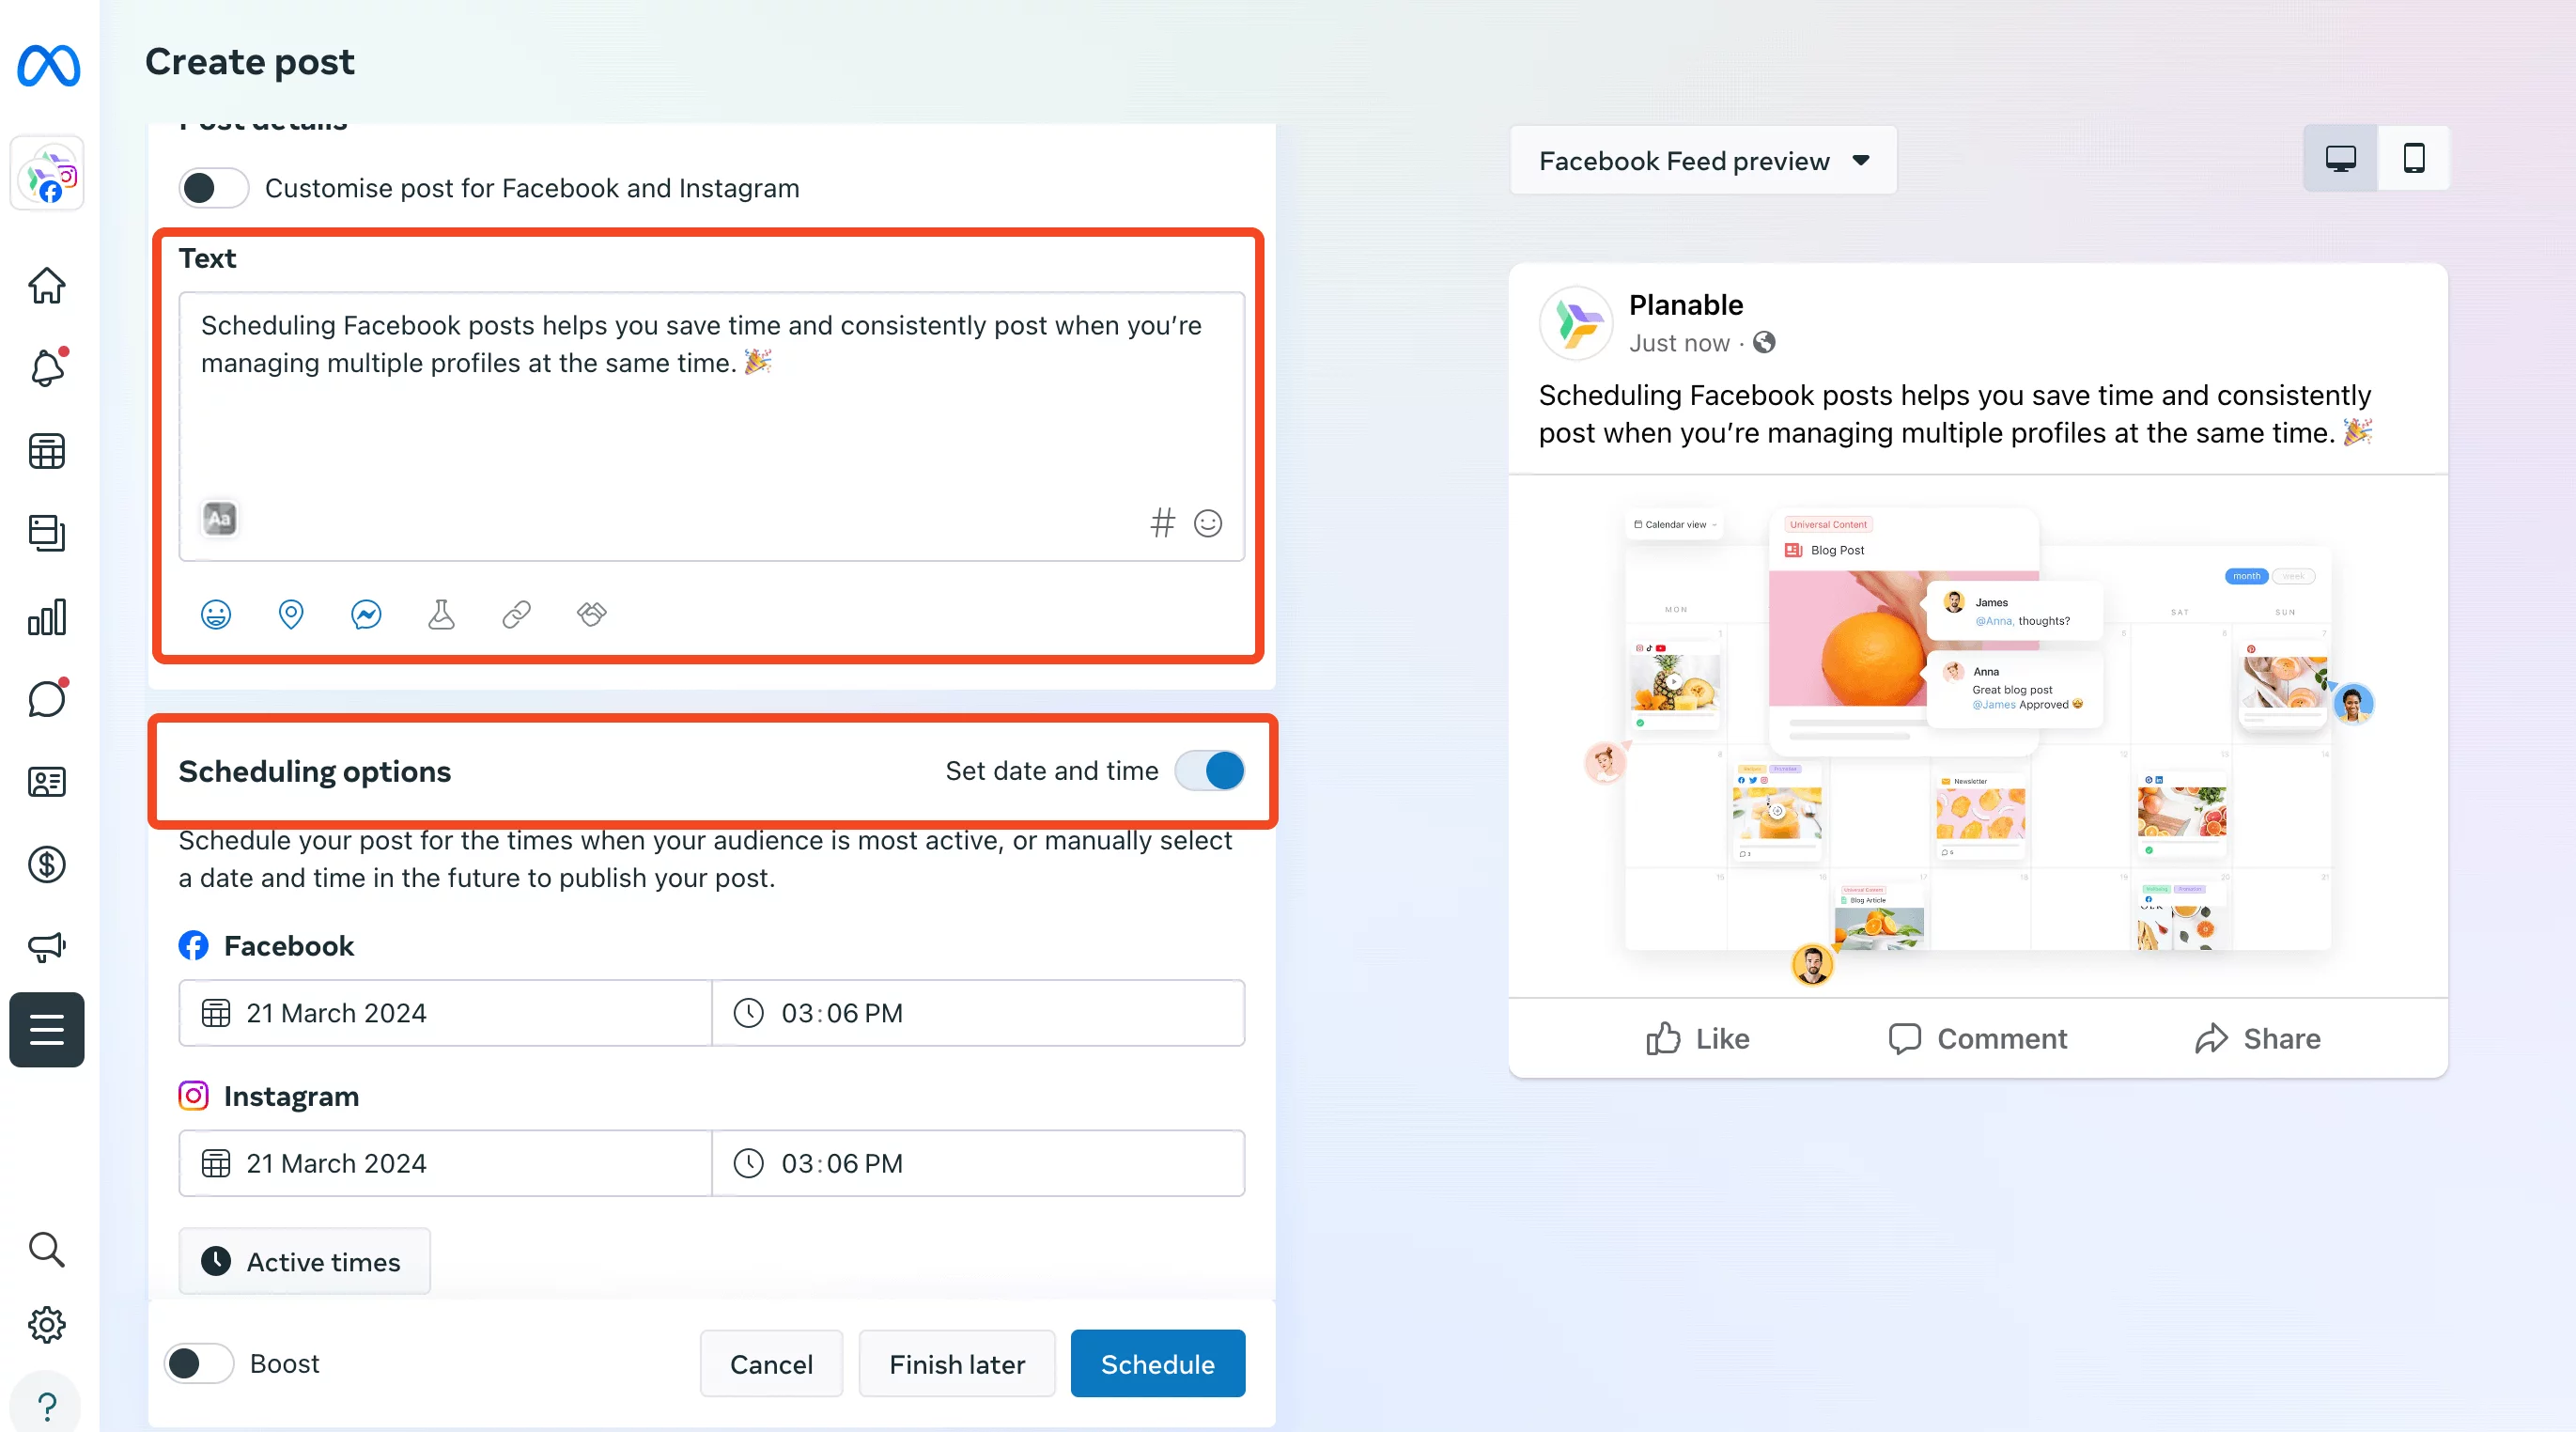
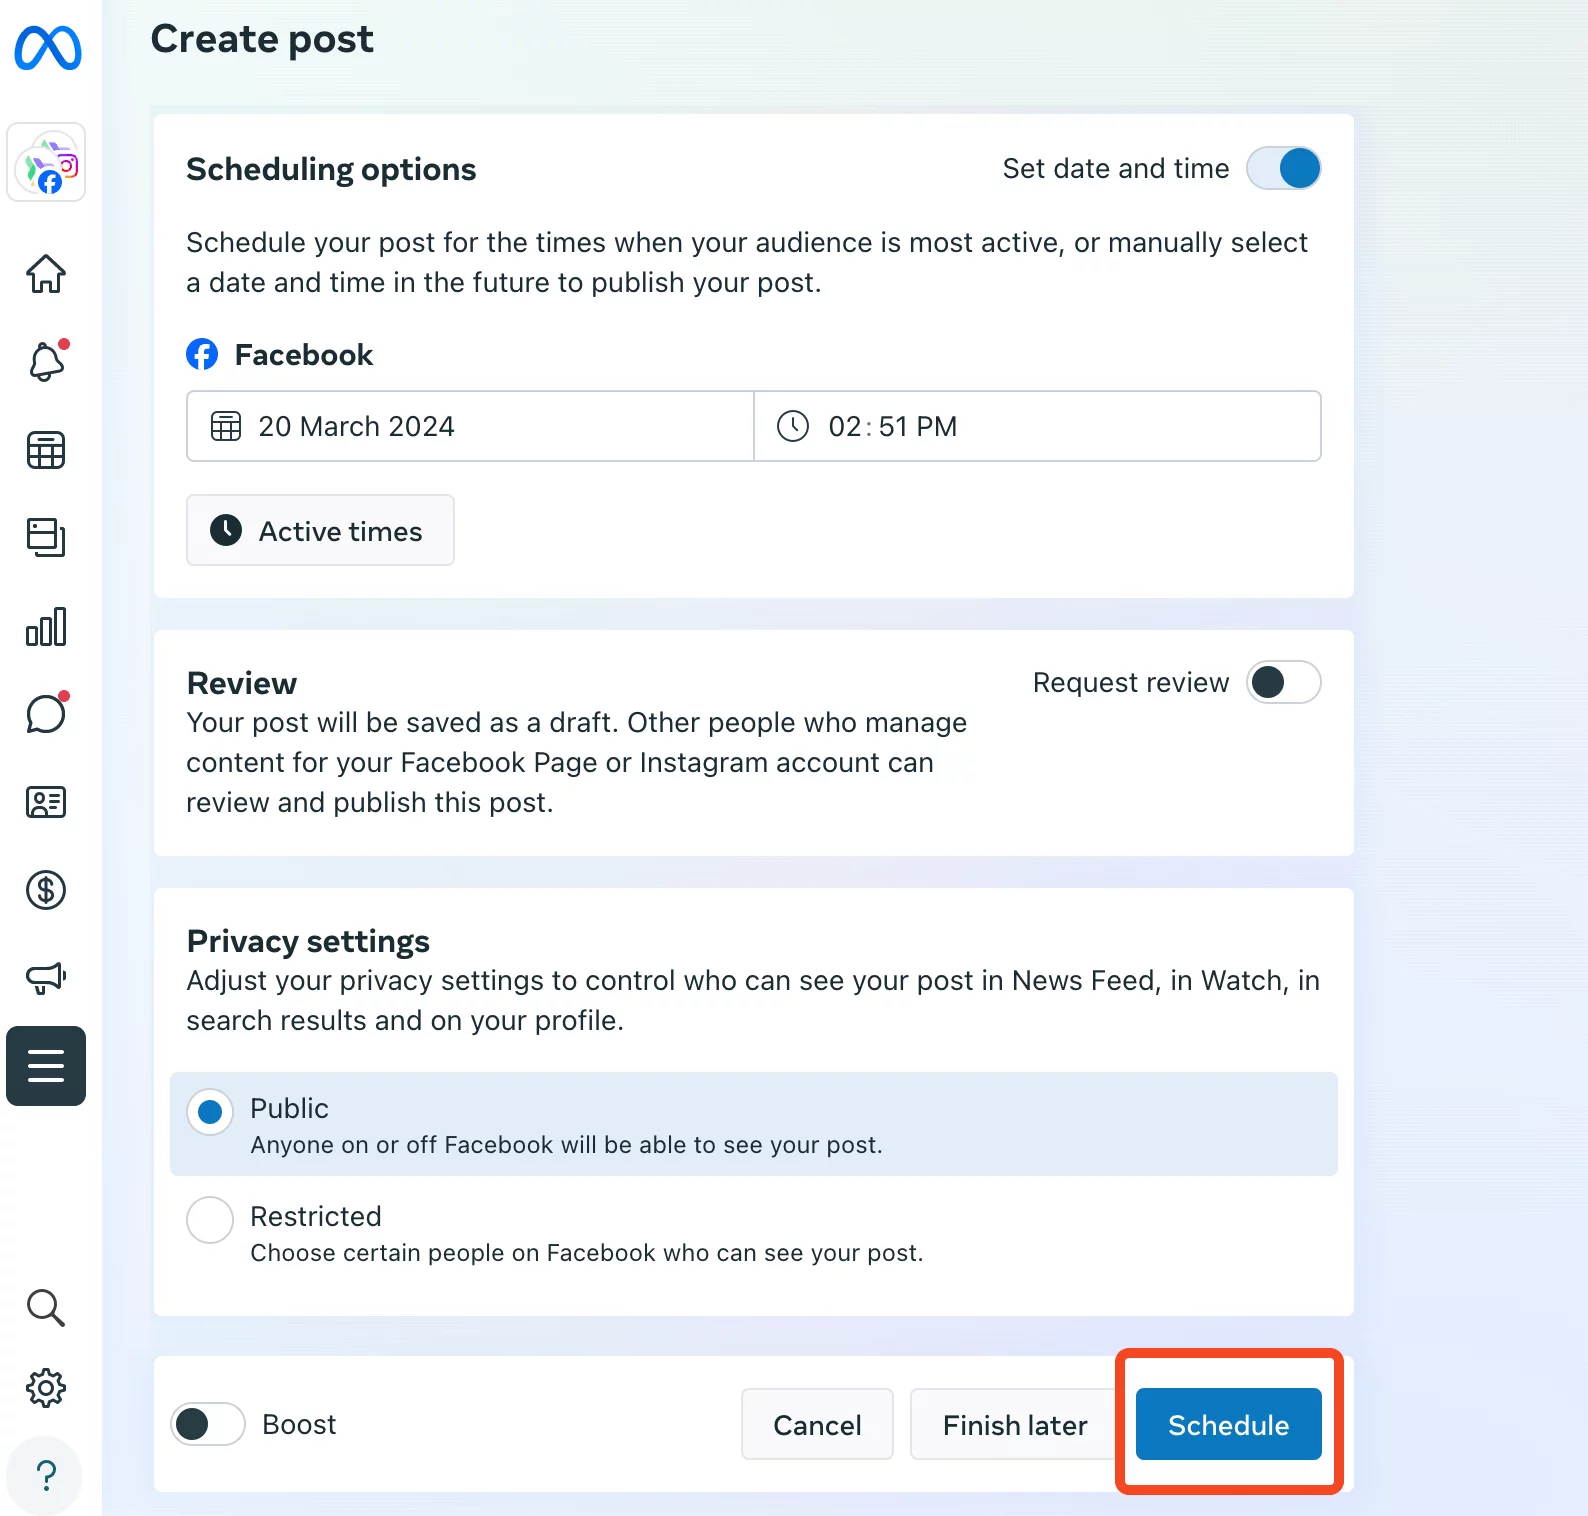
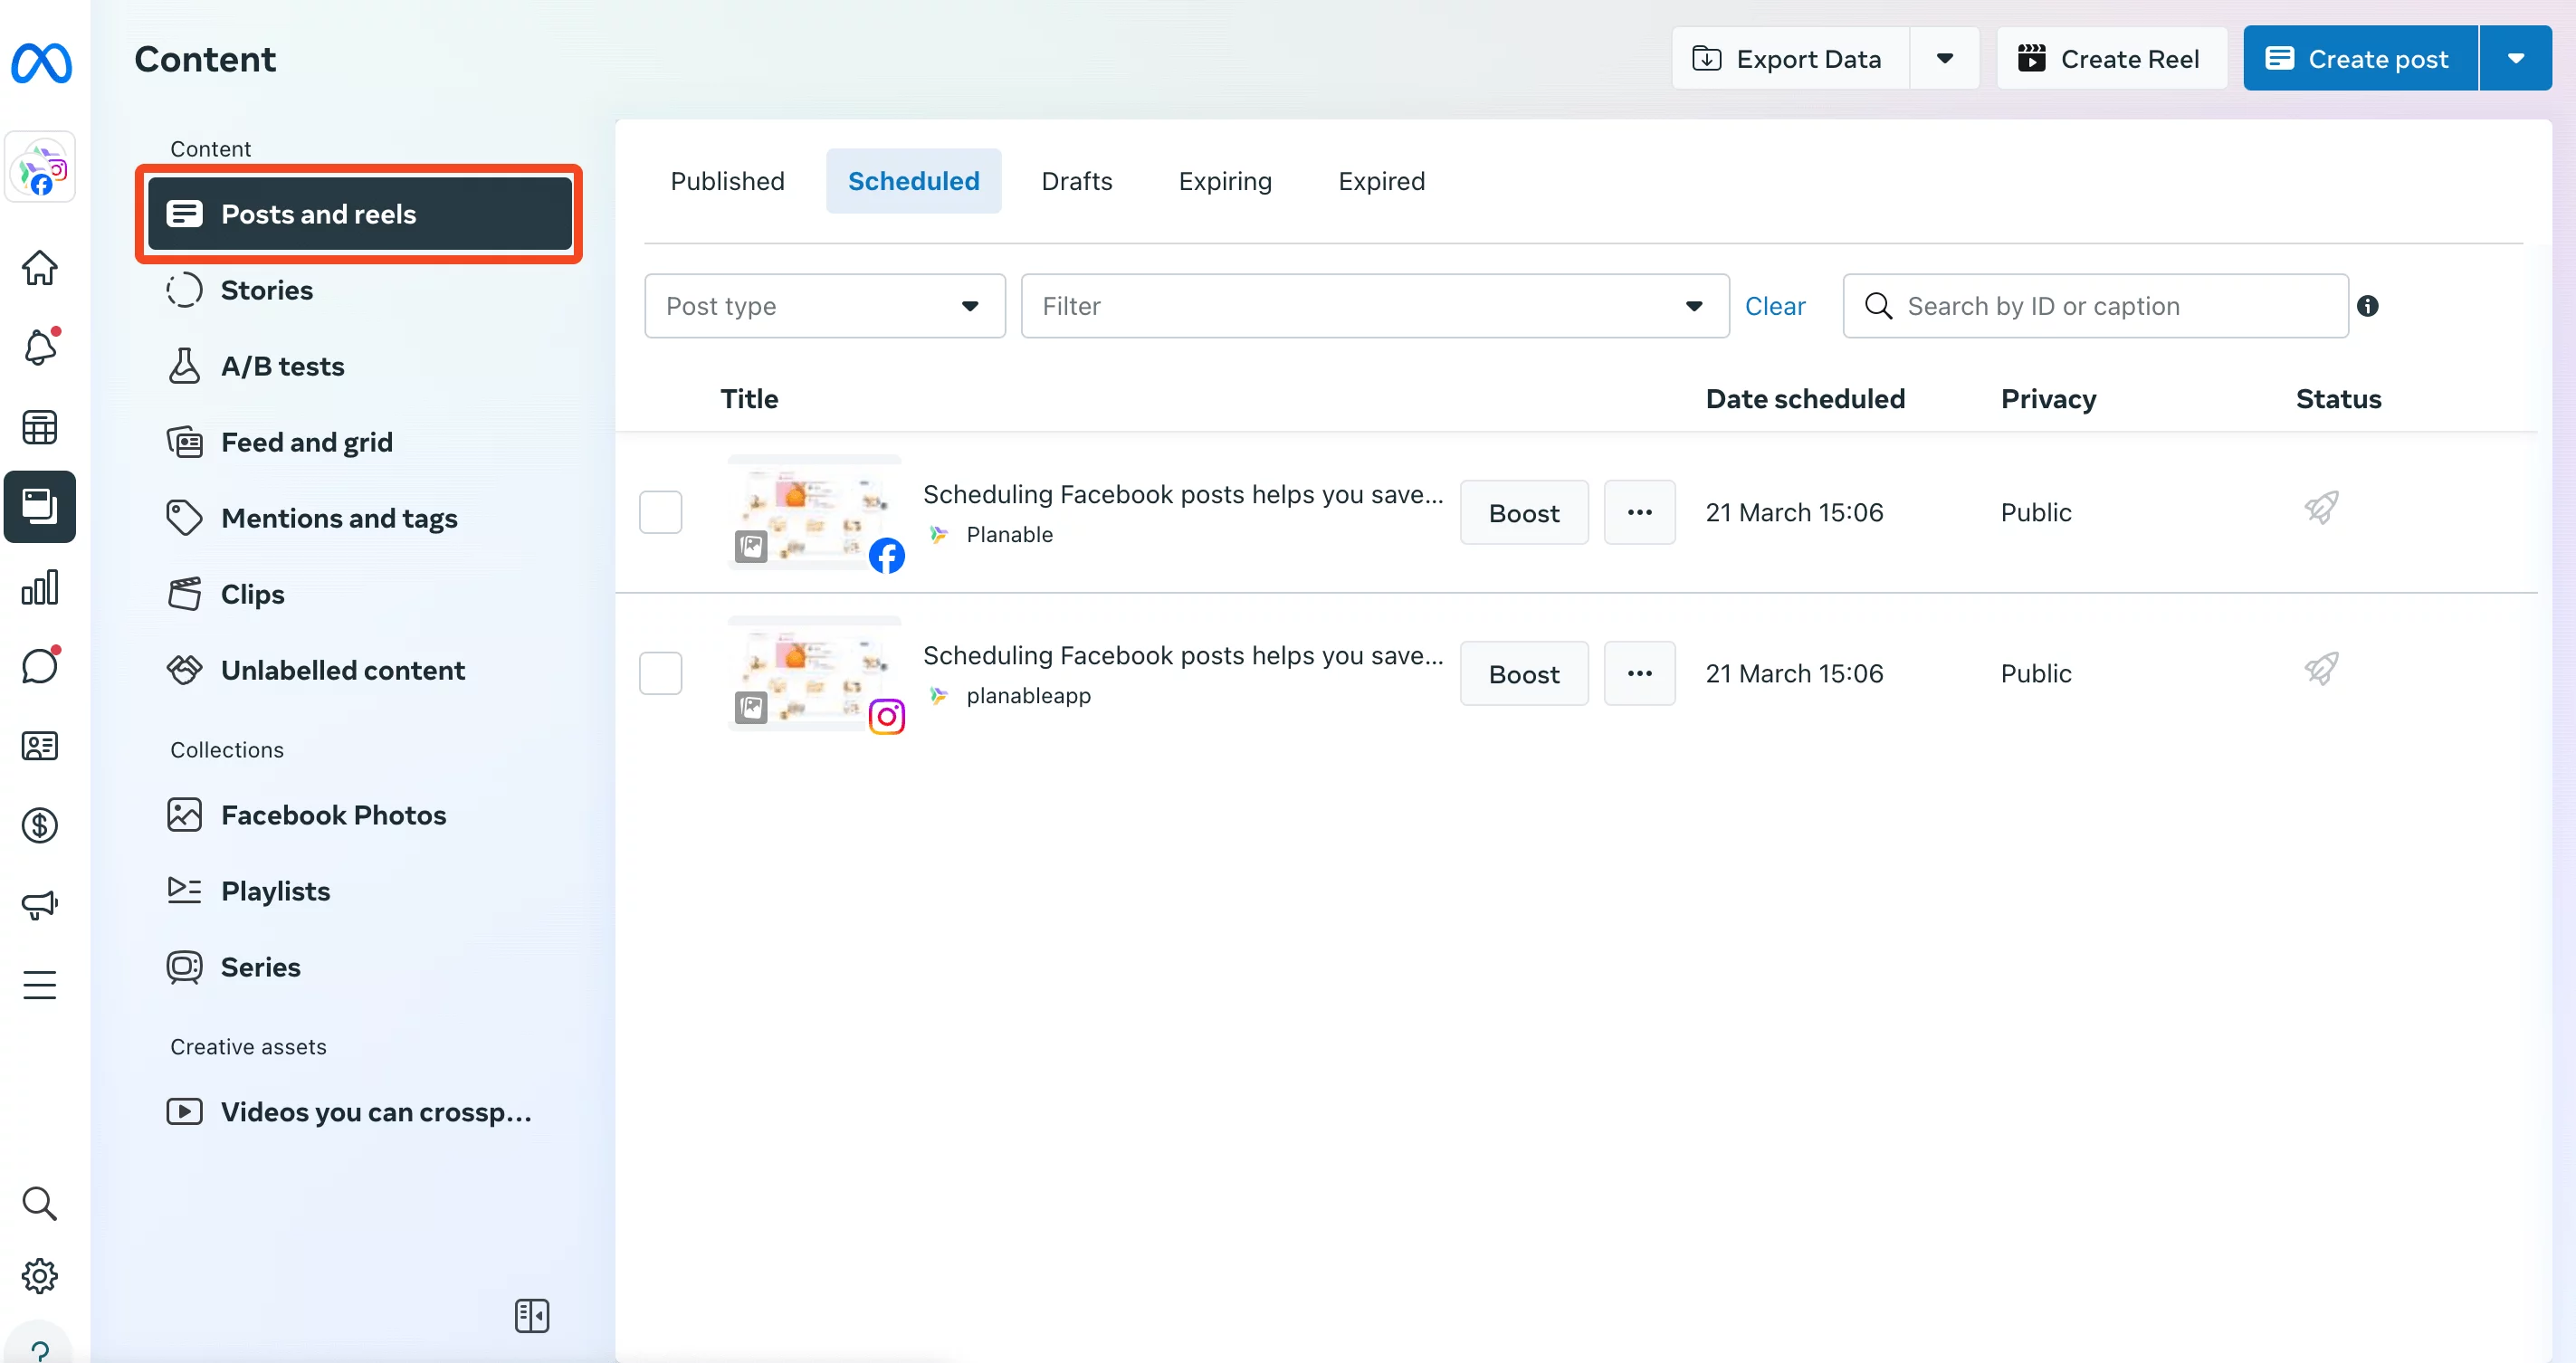
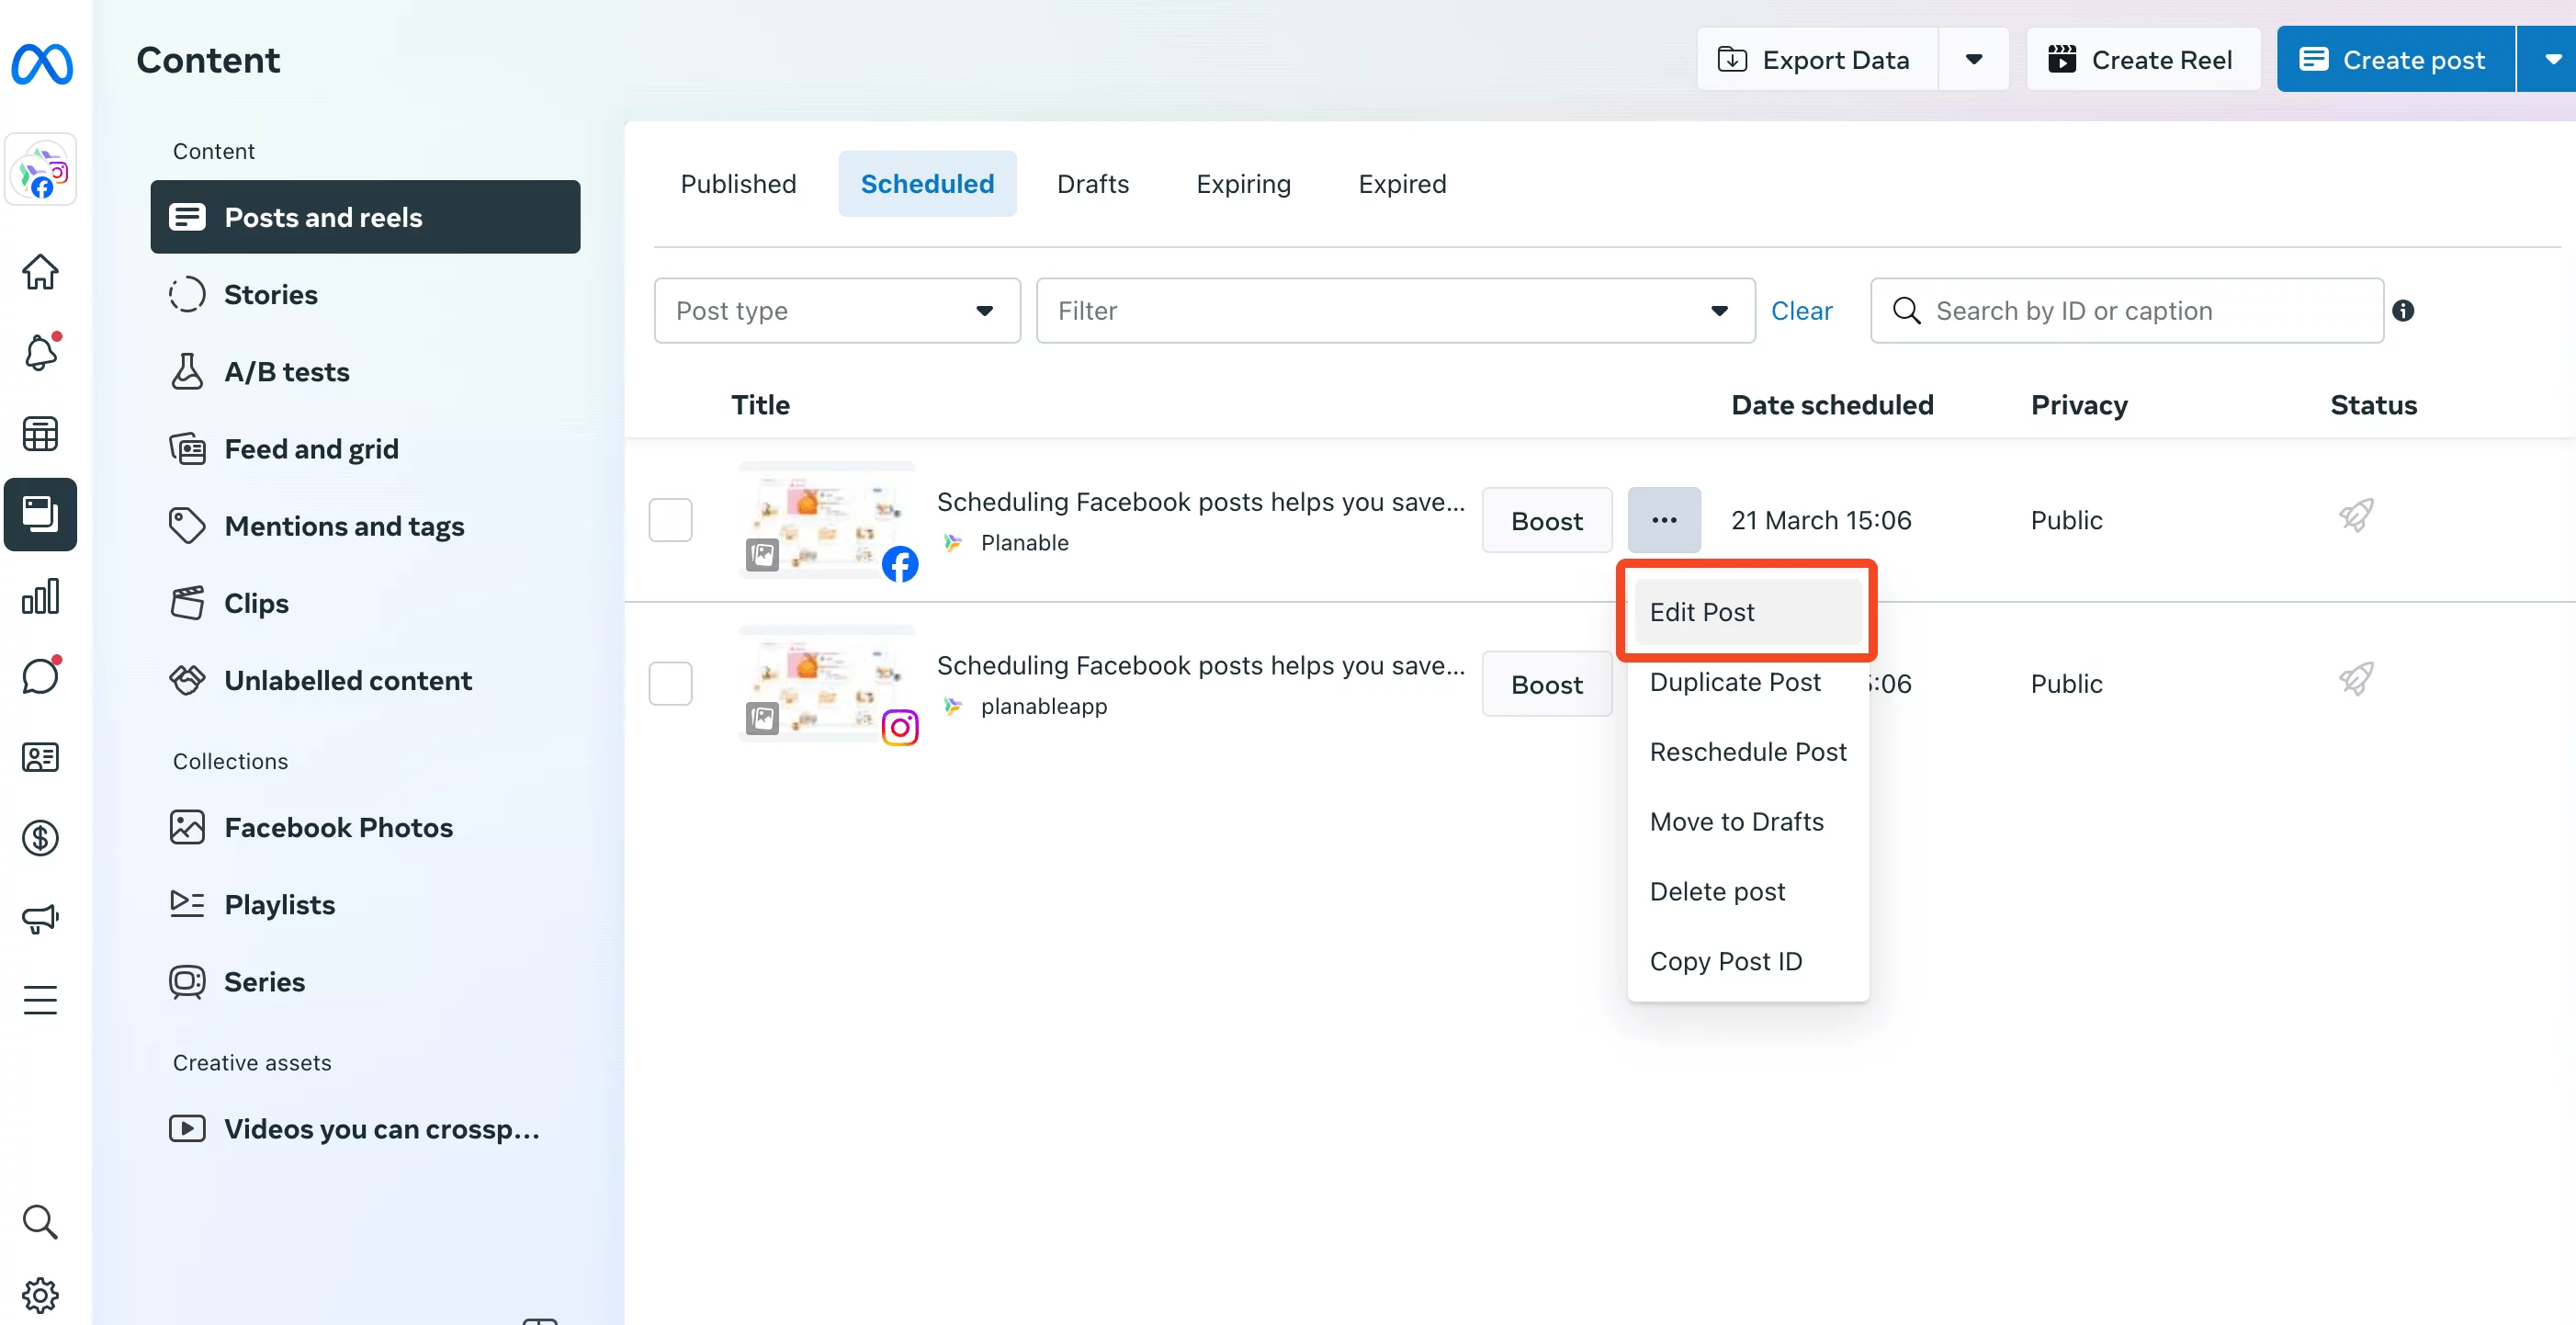
How to schedule a Facebook post using Meta Business Suite
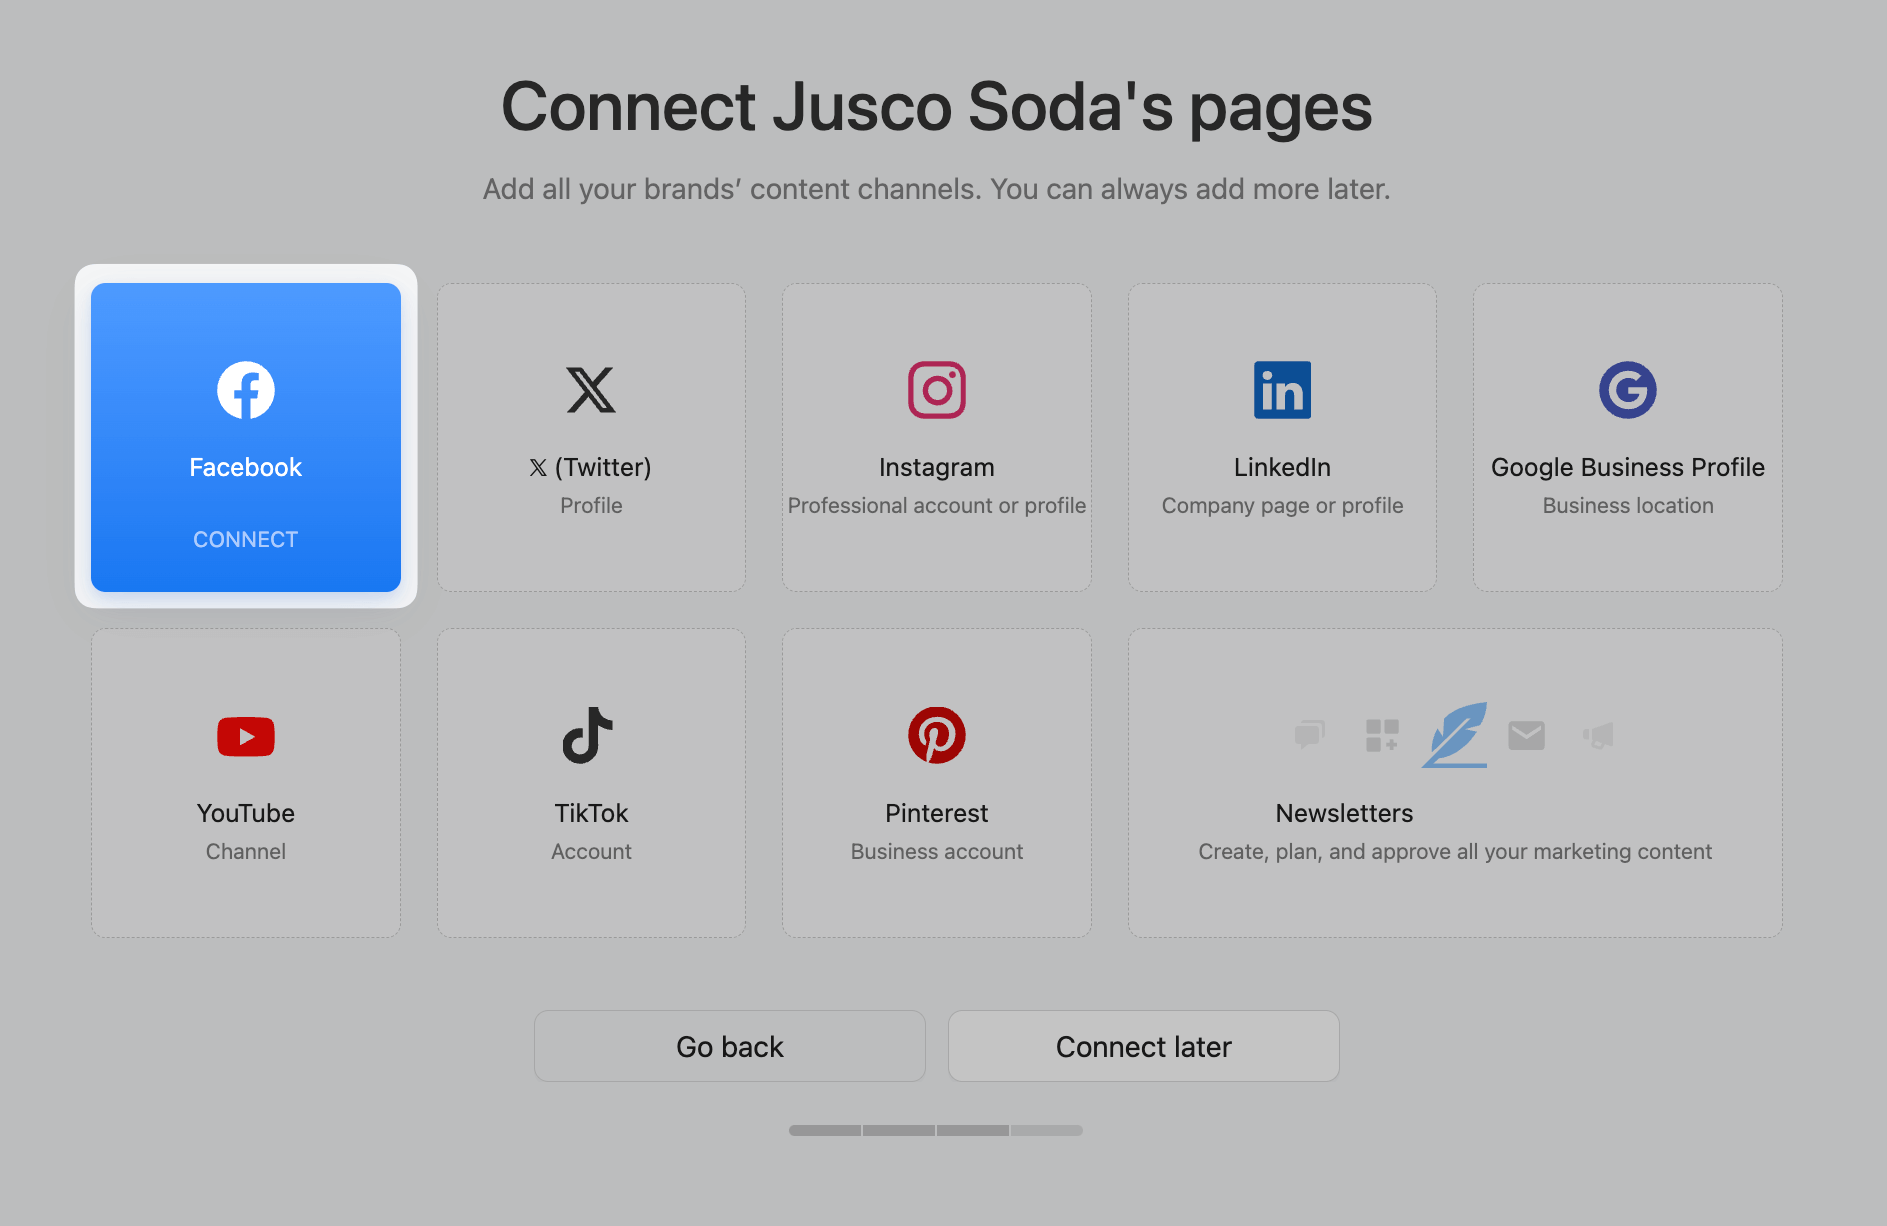
Step 2:Sign up for free, create your workspace and connect your Facebook page on desktop.
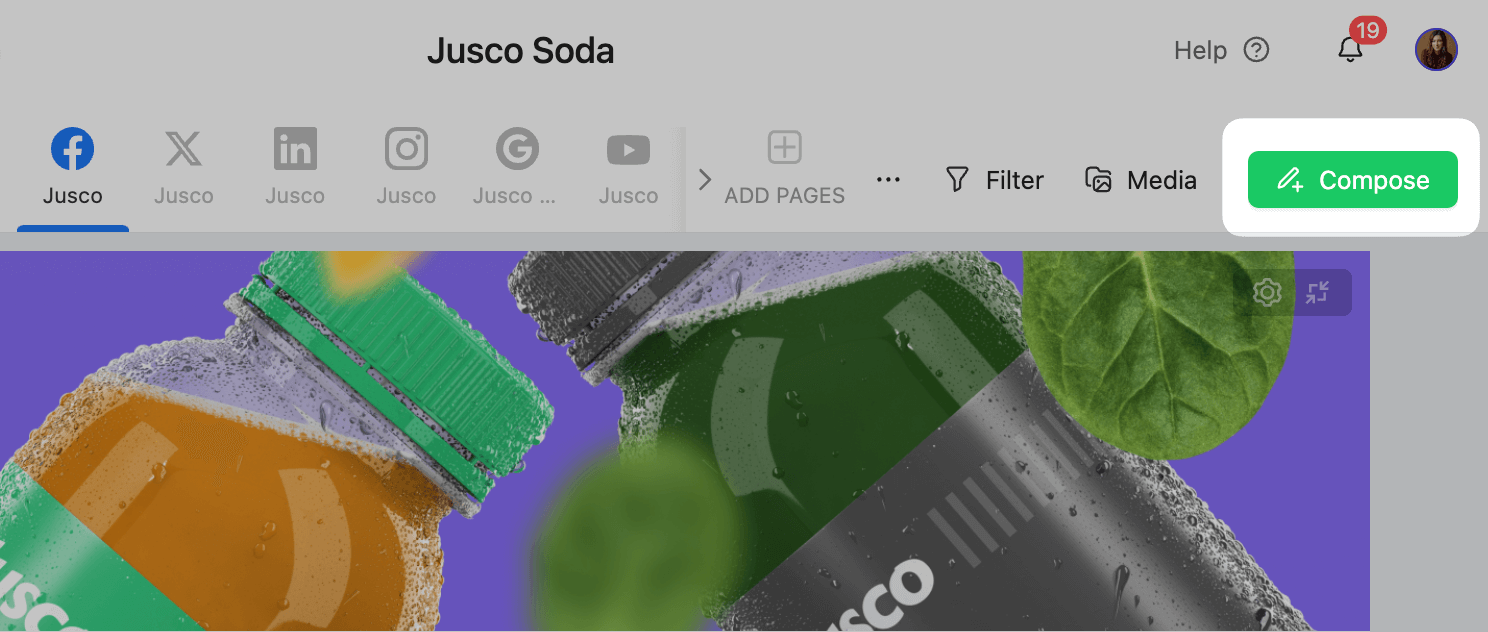
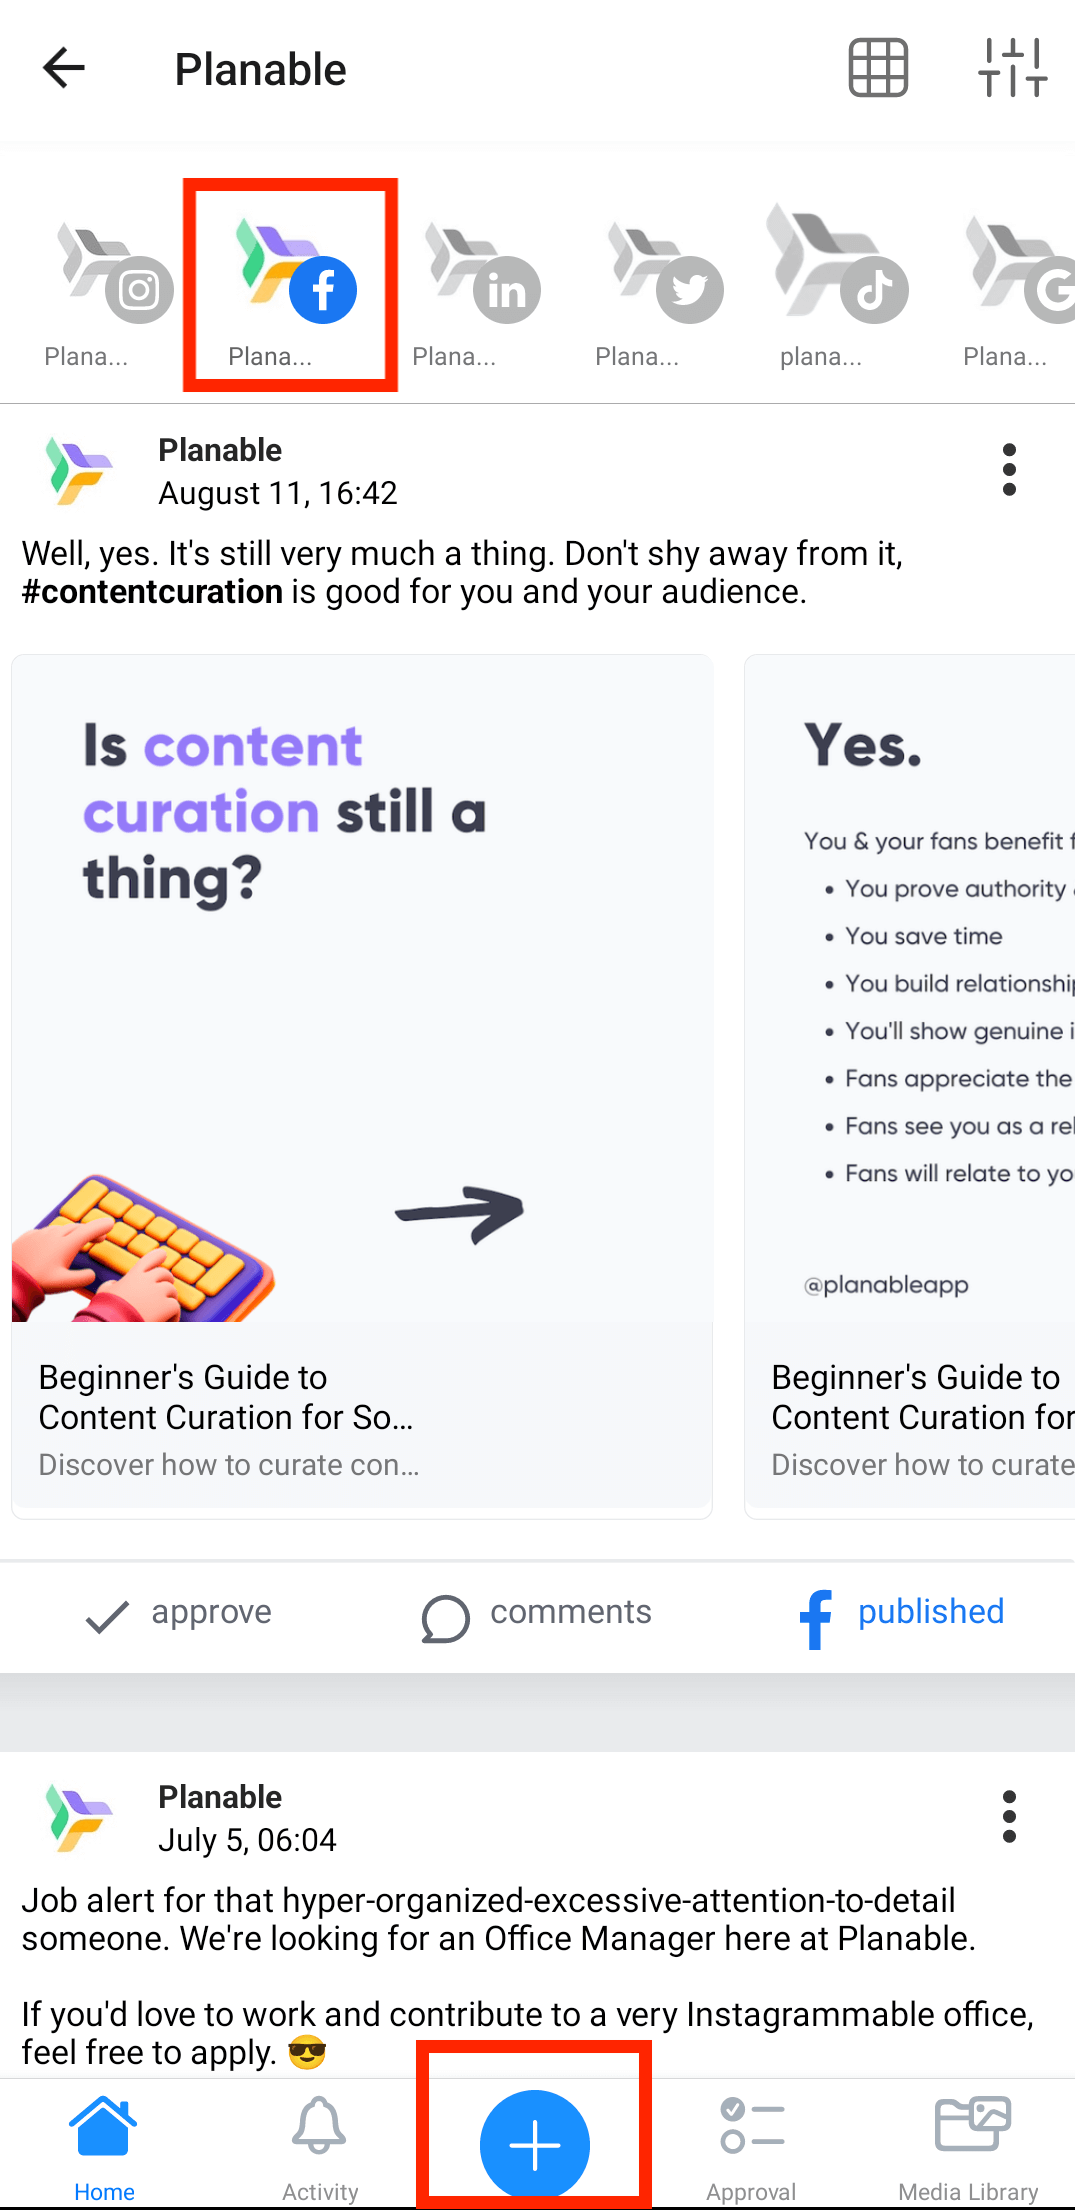
Step 3: From the Planable mobile app, select your Facebook page and tap the Compose button at the bottom of the screen.
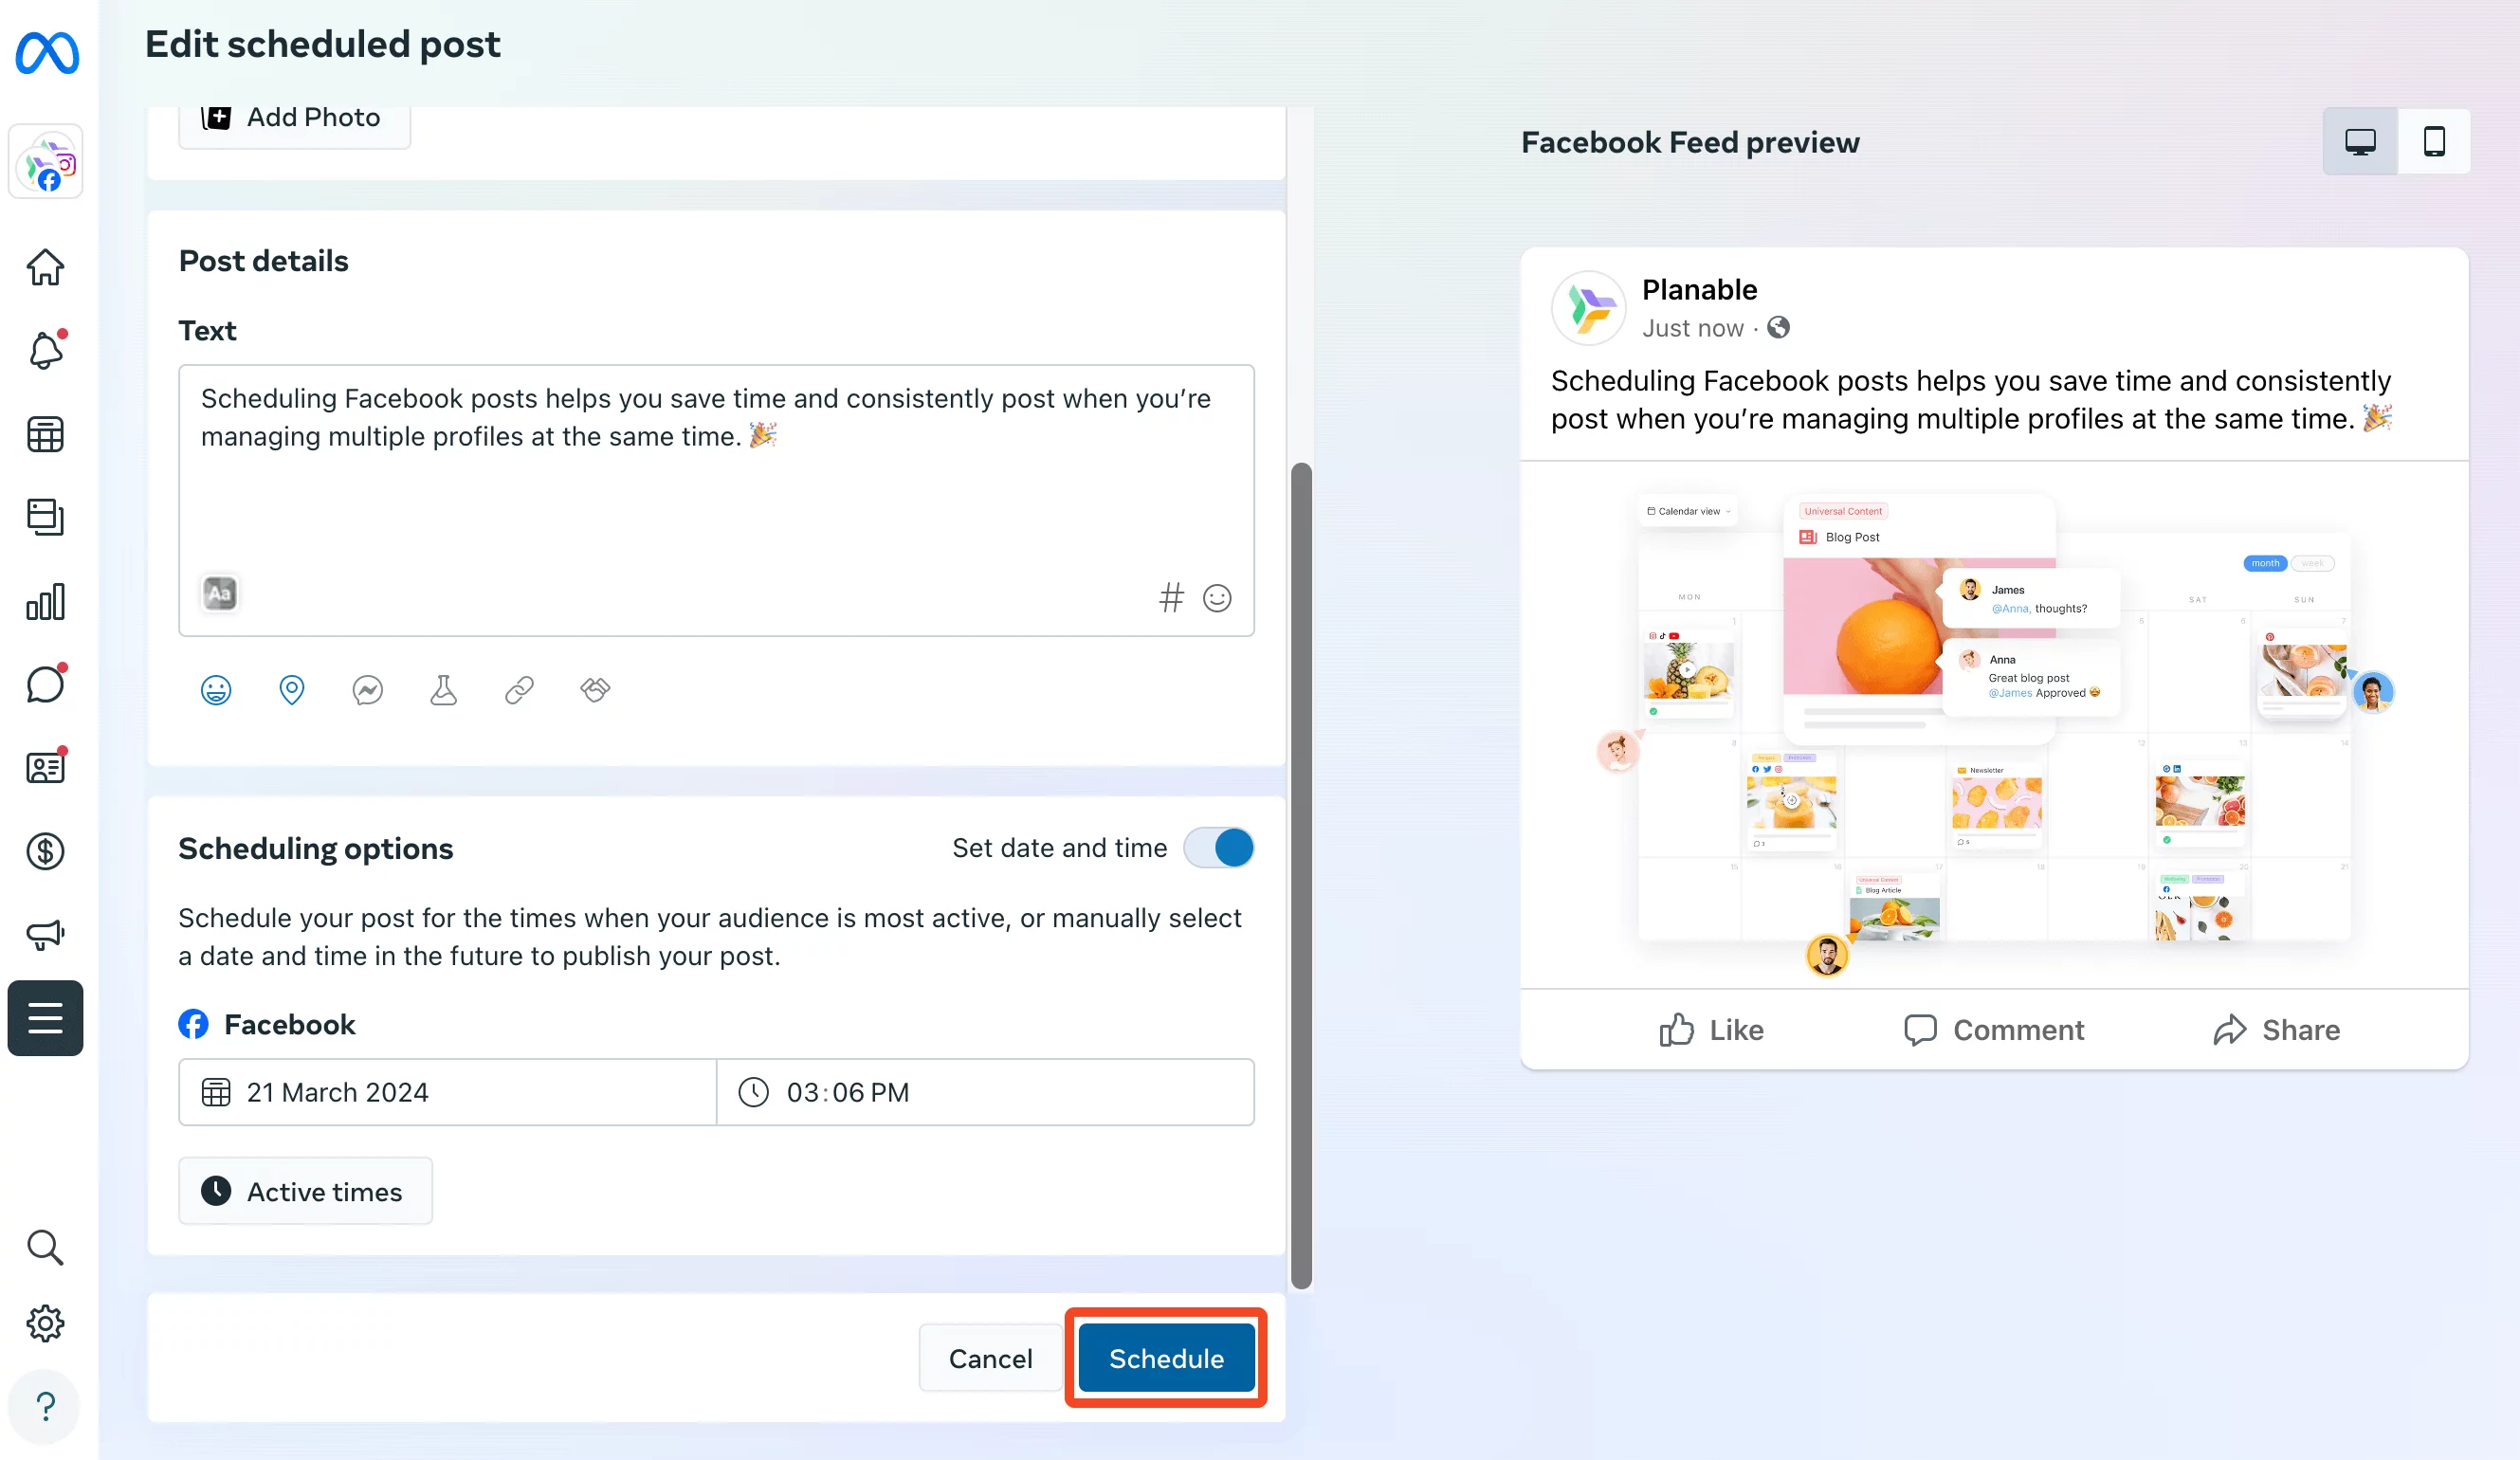
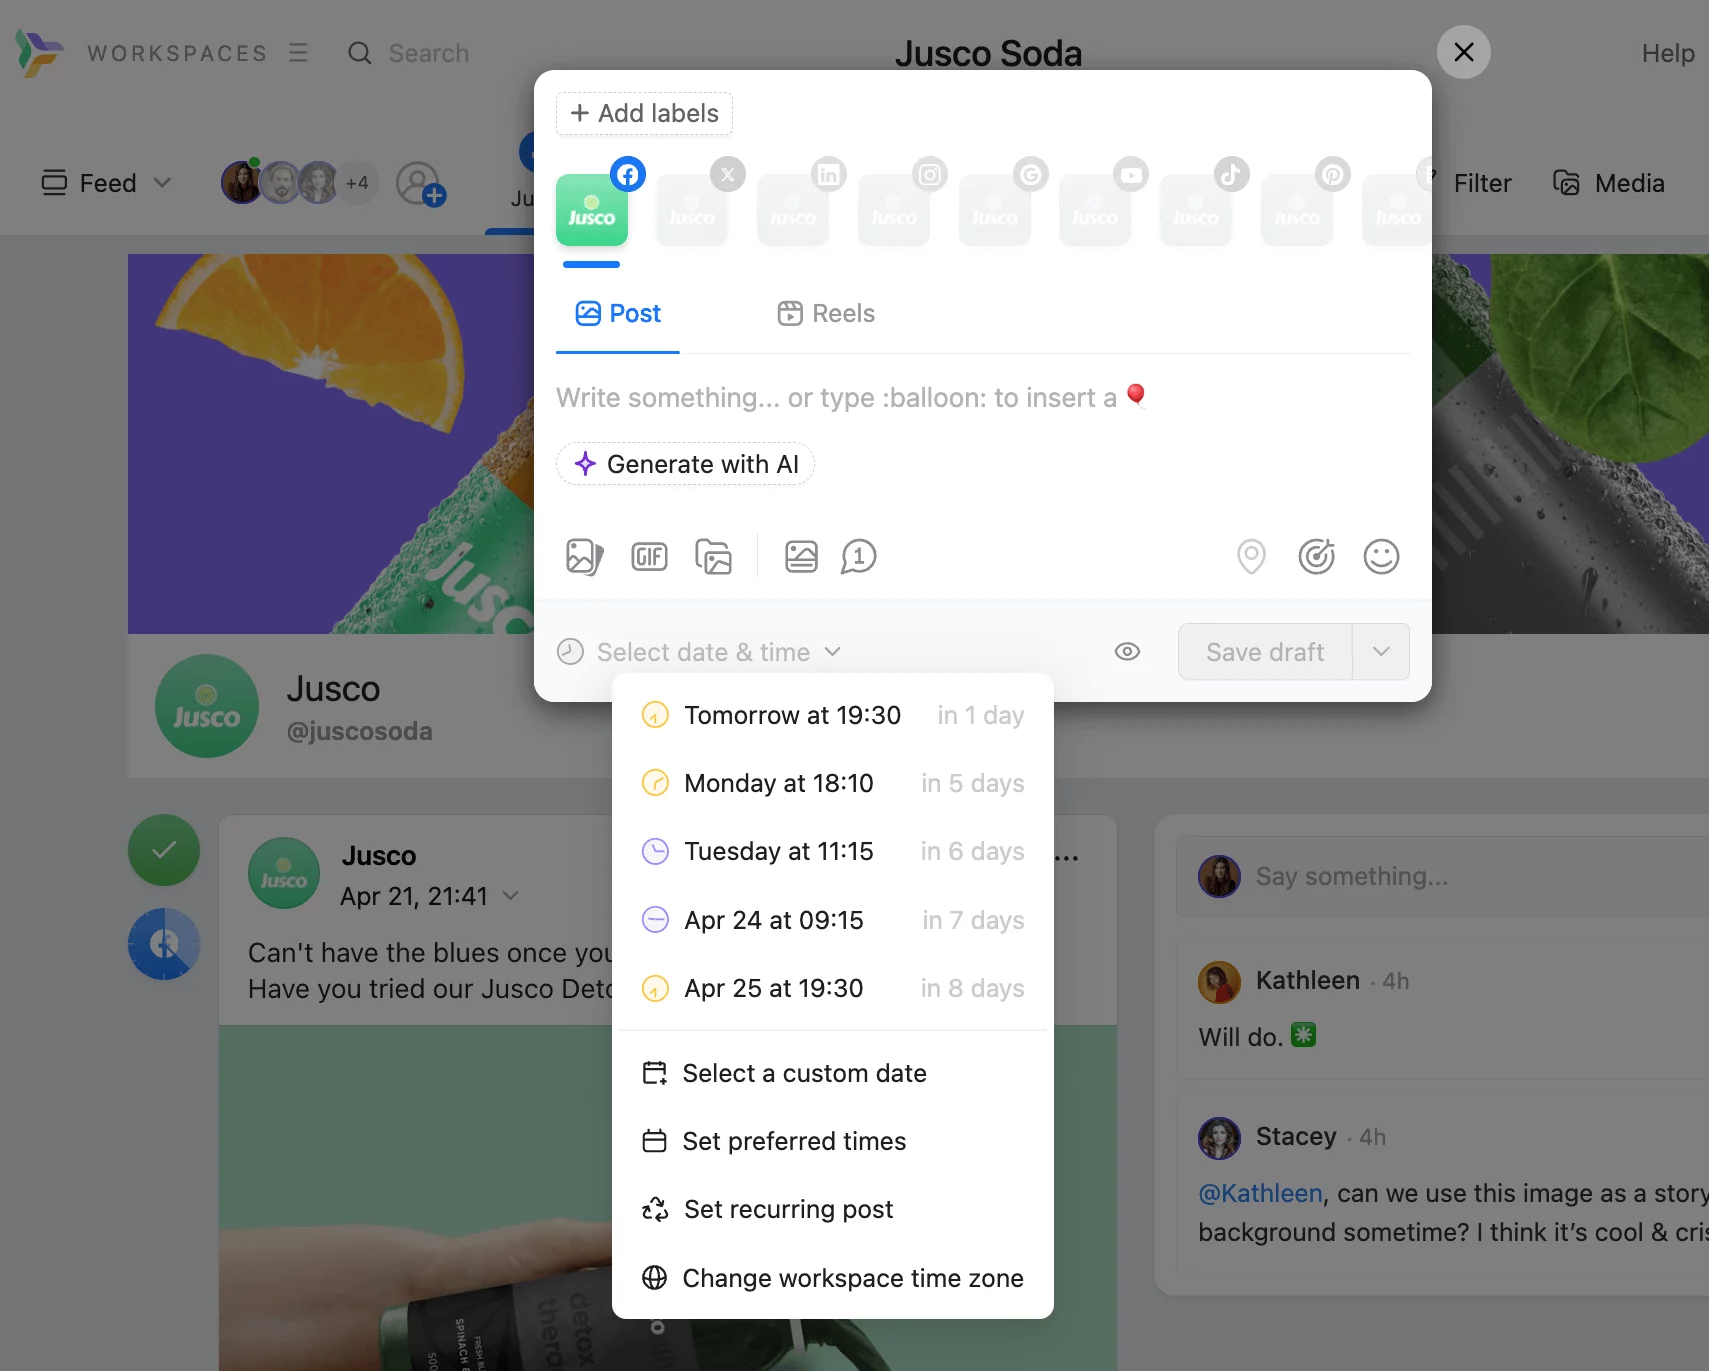
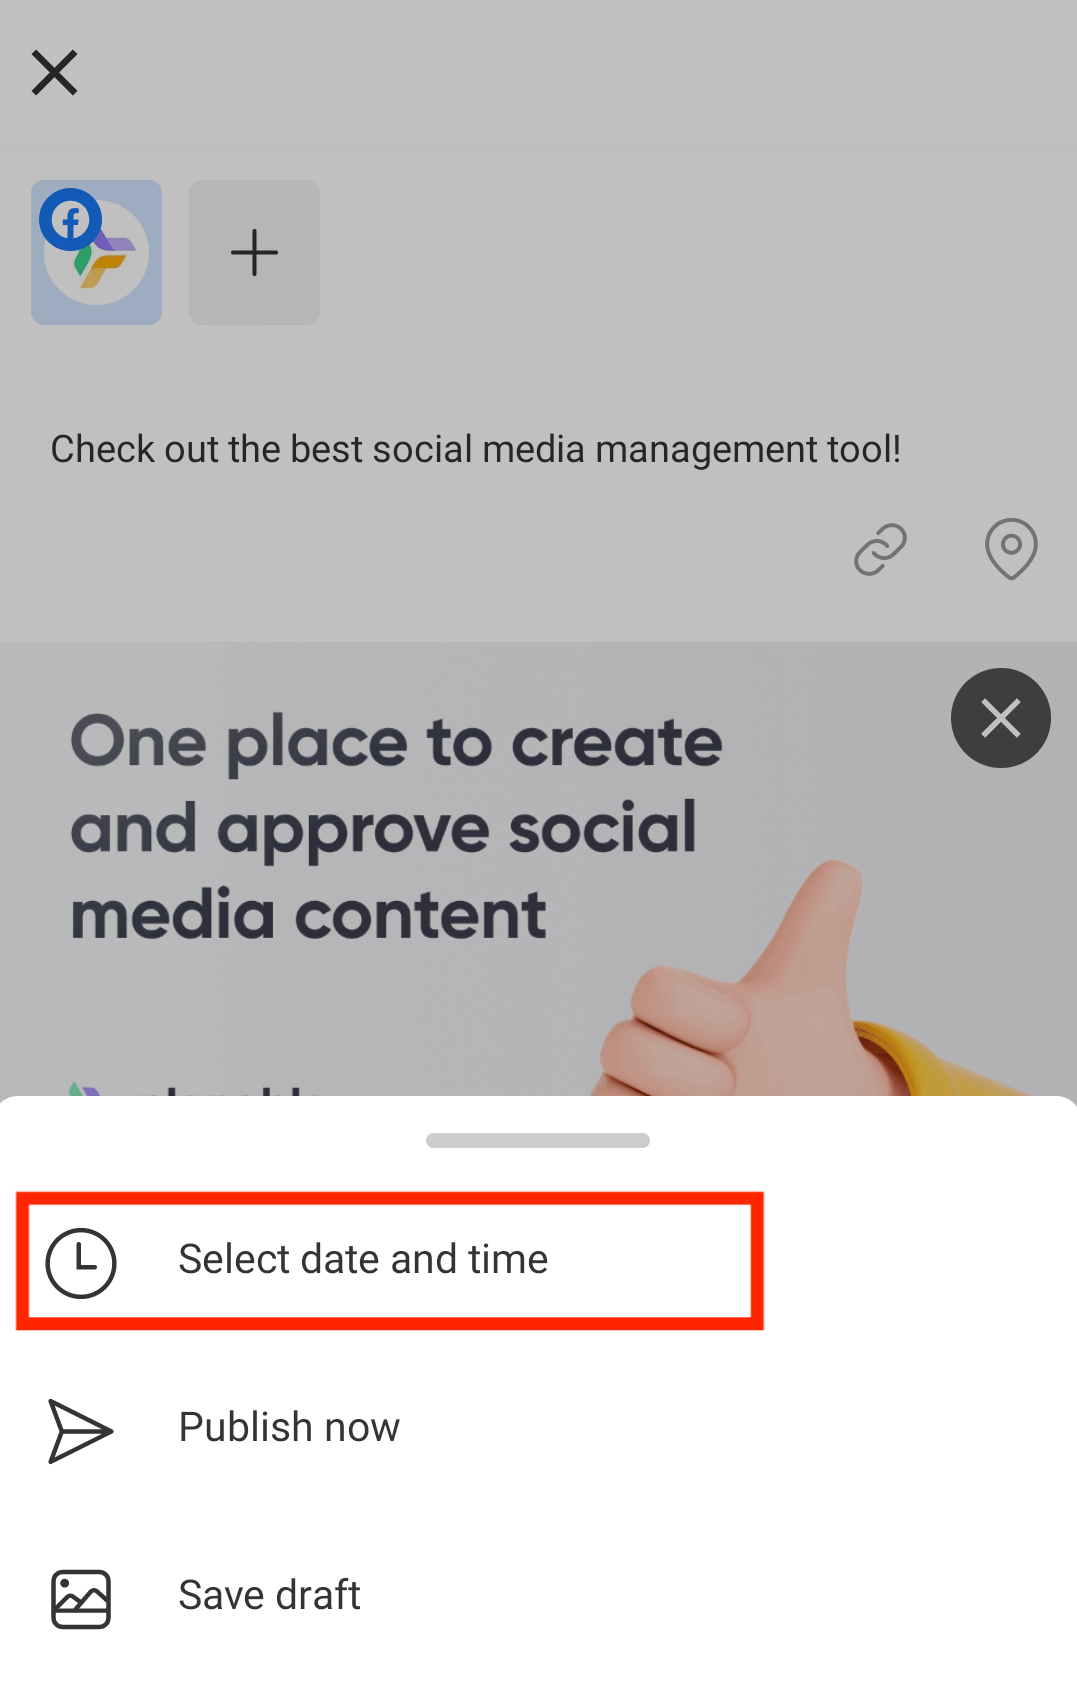
Step 4: Write your copy and tap Next to Select the date and time.
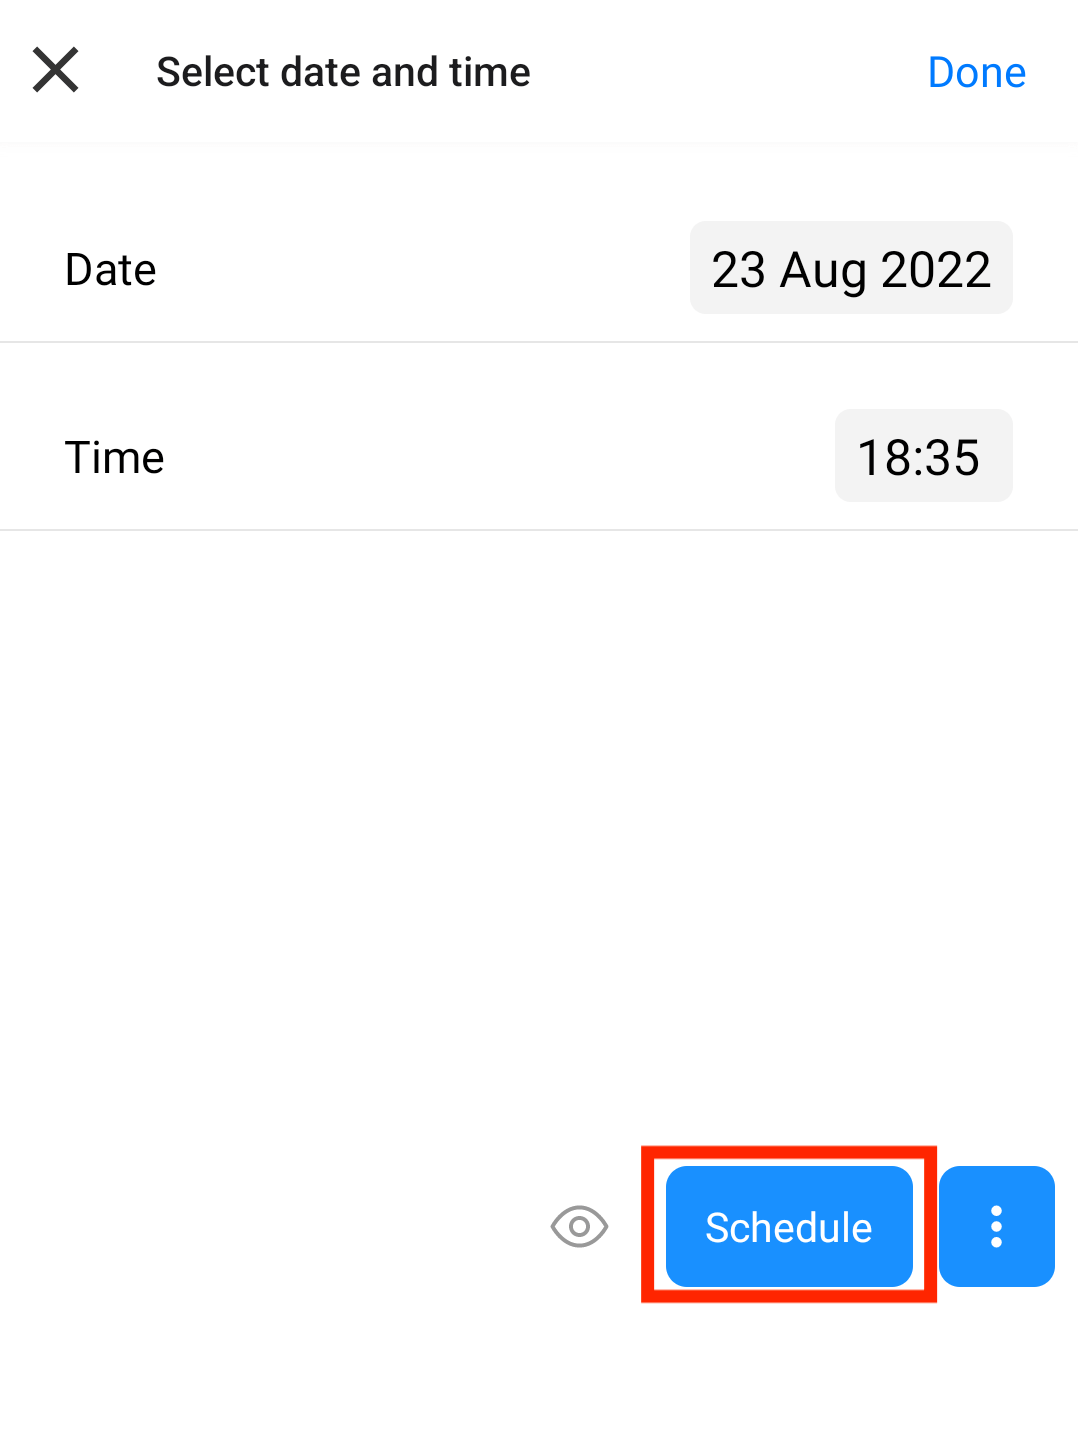
Step 5: Choose the desired date and time and tap Schedule.
Once you’ve got the hang of scheduling your Facebook posts, remember: the right Facebook marketing tools can be a game changer. They simplify everything, allowing you more time to dive into creative ideas and connect with your community.
Don’t forget, you can also schedule Facebook Stories to keep your audience engaged with timely updates and creative content beyond regular posts.
Facebook scheduling tips & tricks
Scheduling posts on Facebook isn’t just about picking a time. It’s about reaching more people, sparking responses, and showing up regularly. Whether you’re managing a business page or running campaigns for your clients, using the right strategies can make a big difference. Below are 3 Facebook scheduling tips to help you post with intent, move quicker, and actually see the impact of what you share.
Establish a posting frequency
There’s no magic number when it comes to posting frequency on Facebook, but the general rule of thumb is to post at least once a day. This ensures that your Page stays active and relevant in users’ News Feeds.
If you’re wondering what to post on Facebook, focus on sharing quality content that your audience will find valuable. Depending on your business, you may not have something new to share every day. That’s perfectly fine! Just make sure that you are consistently posting quality content that your audience will find valuable.
Curate relevant posts
To ensure you’re keeping your Facebook audience engaged, you can curate content from other bloggers in your industry. Try to follow the 80/20 ratio: 80% original content created by you and 20% curated content that’s relevant to your audience’s pain points.
Creating original content is tough and time-consuming. Trends, seasons, product releases, it’s a lot! But our AI Facebook caption generator is here to help. Speed things up and fill your content calendar with engaging FB posts in no time!
Be creative in advance
We are not always creative, so in the moments when we are inspired or have a lot of ideas, it’s good to take a moment to film or create more content. In this way, we will have content for a longer period of time and will avoid the potential appearance of stress because we don’t have content/need to do something urgently; thus, we also increase the quality of the content (all of this based on an already existing strategy).
The Meta Business Suite App is a great way to publish and schedule posts to your Facebook and Instagram accounts. However, if your needs extend beyond these simple requirements, Planable could be an excellent choice for you.
Here are the main differences between the 2 schedulers:
Publish content on all Facebook pages at once
With a Facebook management tool like Planable, you can publish content on all your Facebook pages at once. At the moment, you can’t do this with Meta Business Suite, you need to schedule posts on one Facebook page at a time.
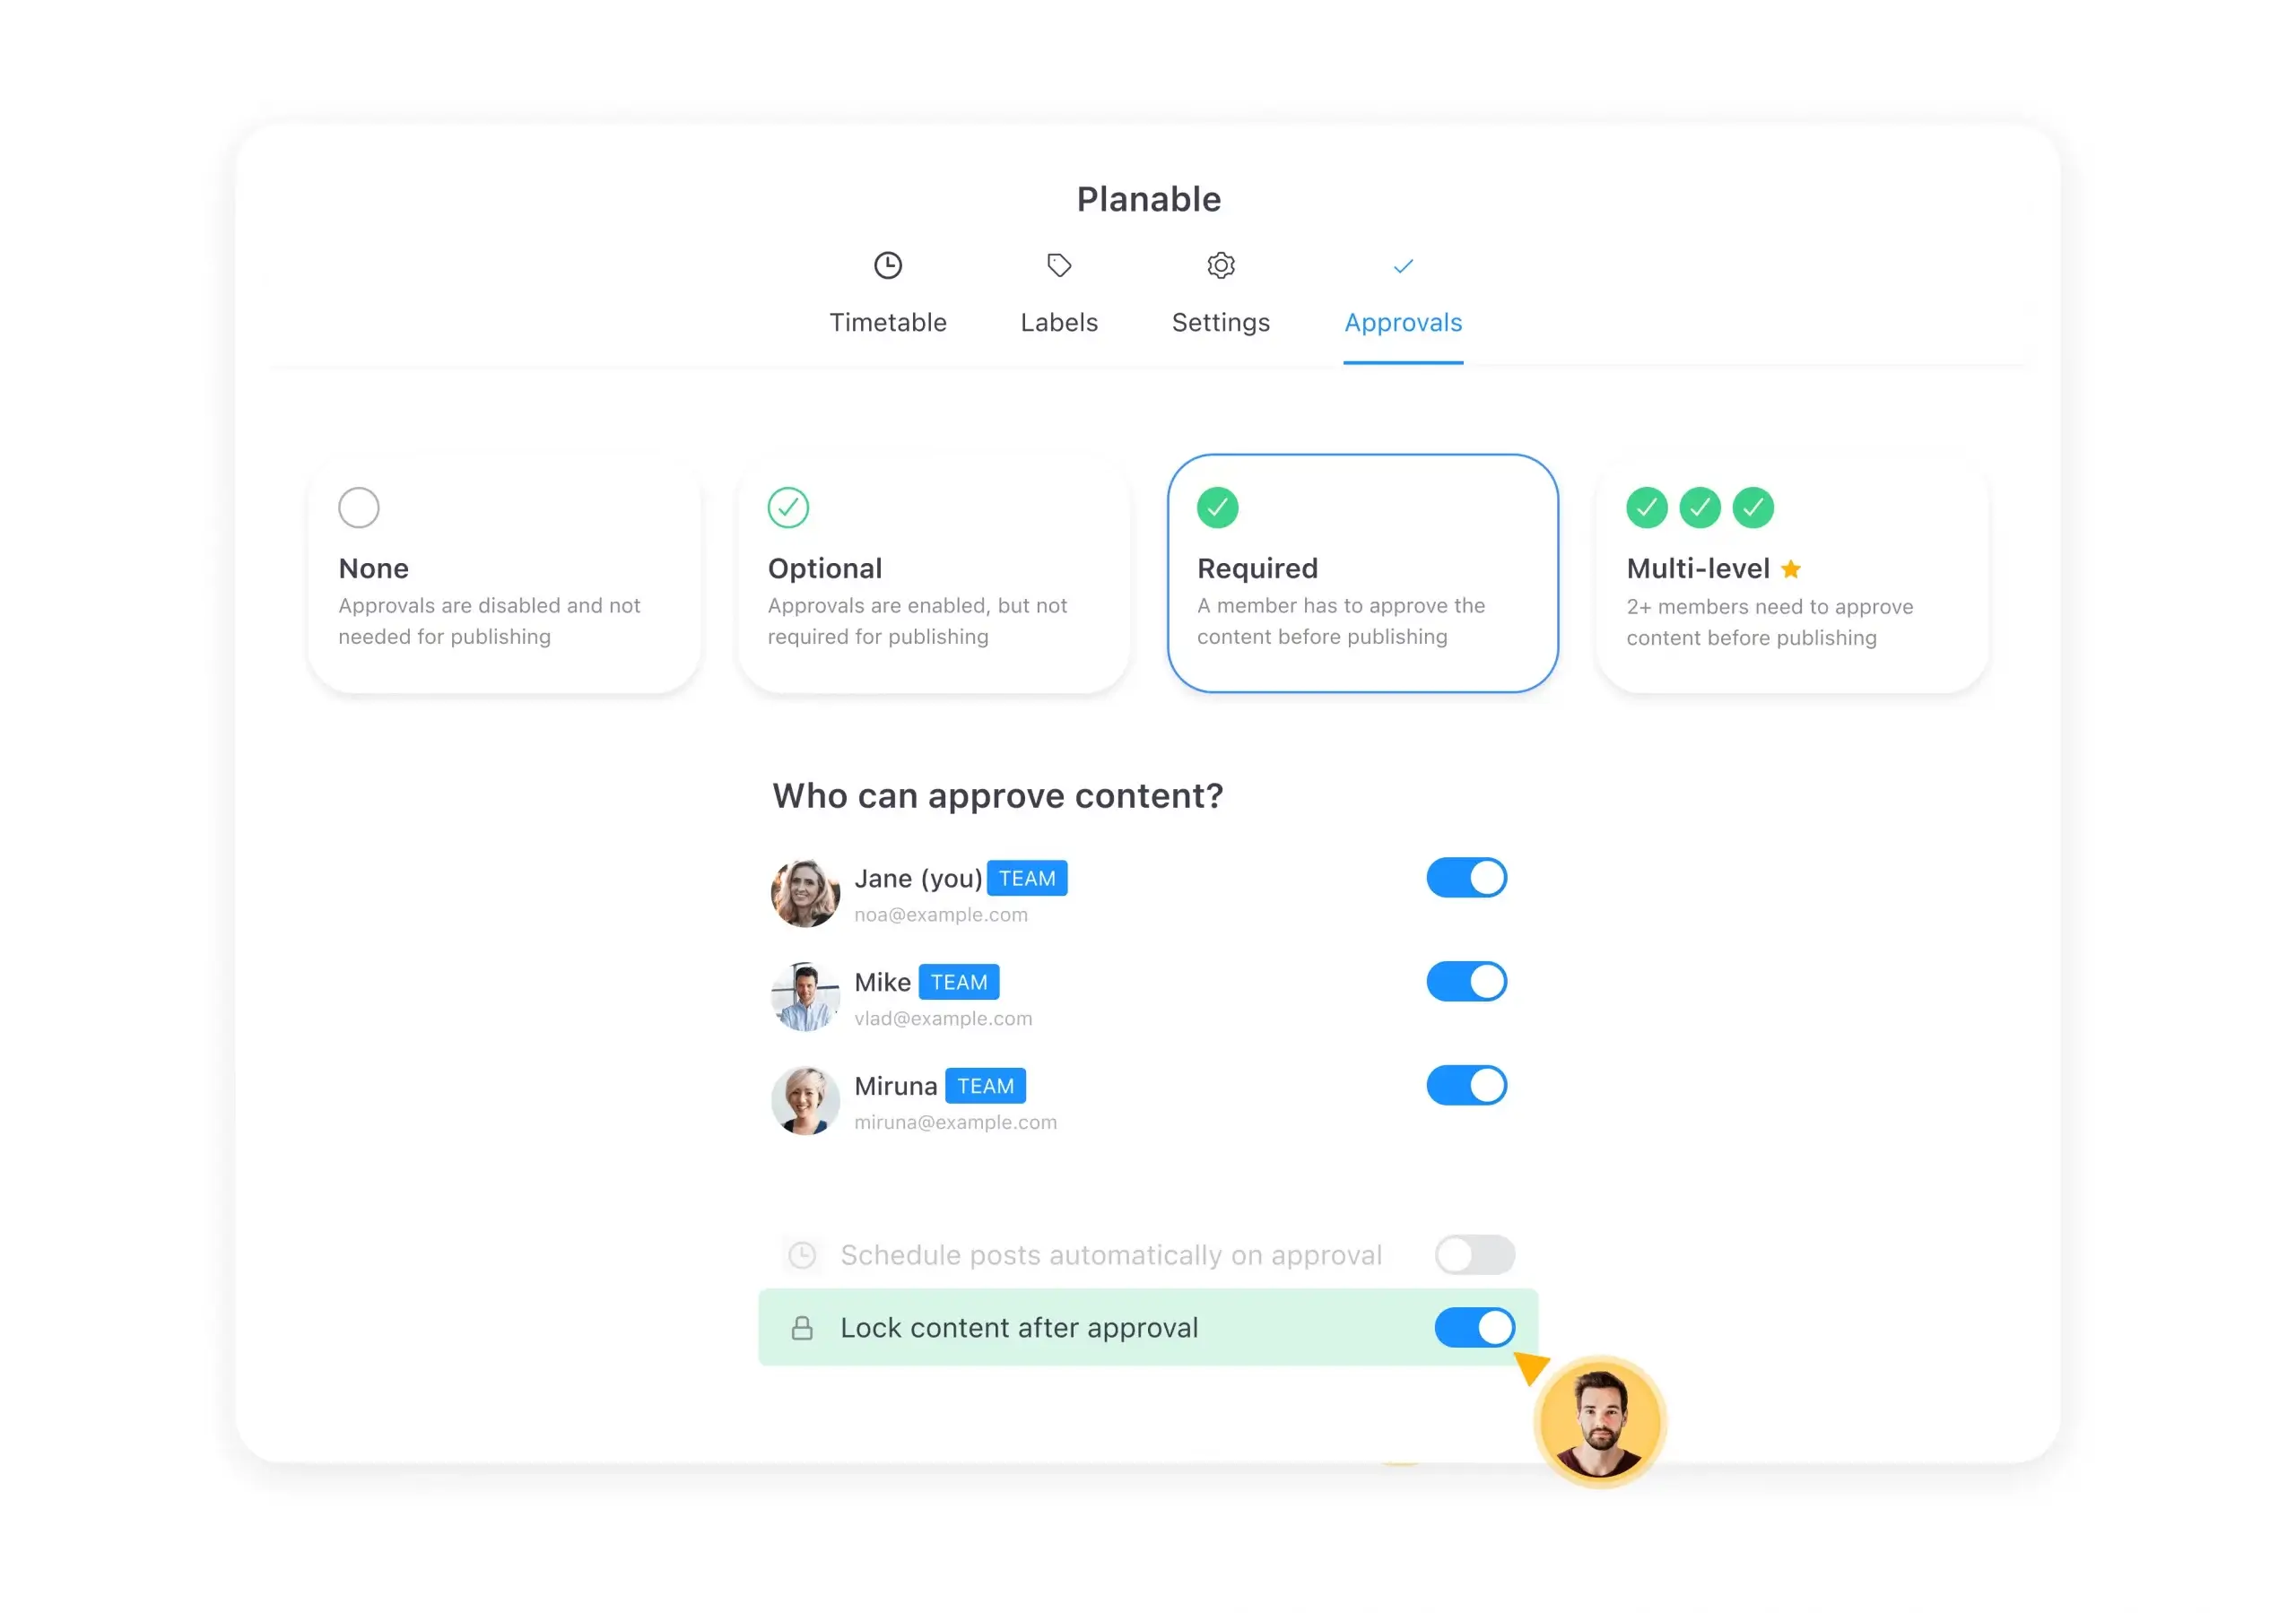
Planable’s Facebook Scheduler has powerful collaboration and approval features with next-to-the-post comments, activity history, and helpful notifications. Our app was built with marketing teams in mind and includes workflow options that vastly speed up your workflow.
Planable offers four different set-ups for approvals:
1. None.
2. Optional – suitable for Social Media Managers who don’t want to make approvals mandatory.
3. Required – a must-have for safety and security, at least one approver needs to approve the post before it can go live.
4. Multi-level – any one approval will move the status of the post forward.
Schedule recurring posts
With Planable, you can easily recycle evergreen content. Use the recurring post option to schedule the same Facebook post multiple times weeks or months in advance.
Schedule posts on pages and groups simultaneously
A social media scheduler like Planable allows you to publish on pages and groups at the same time. At the moment, this is not possible in Meta Business Suite.
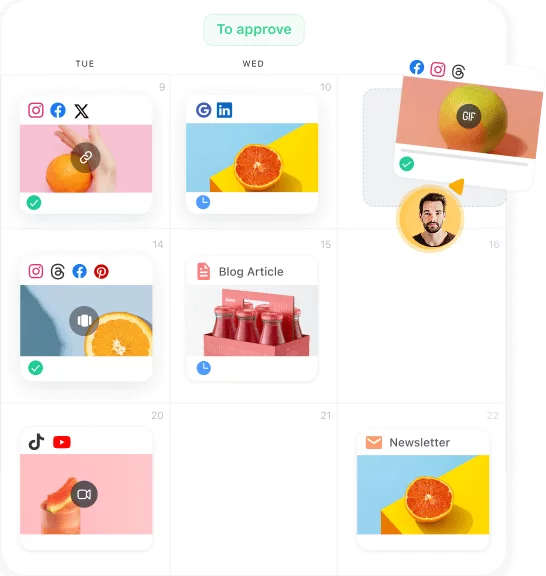
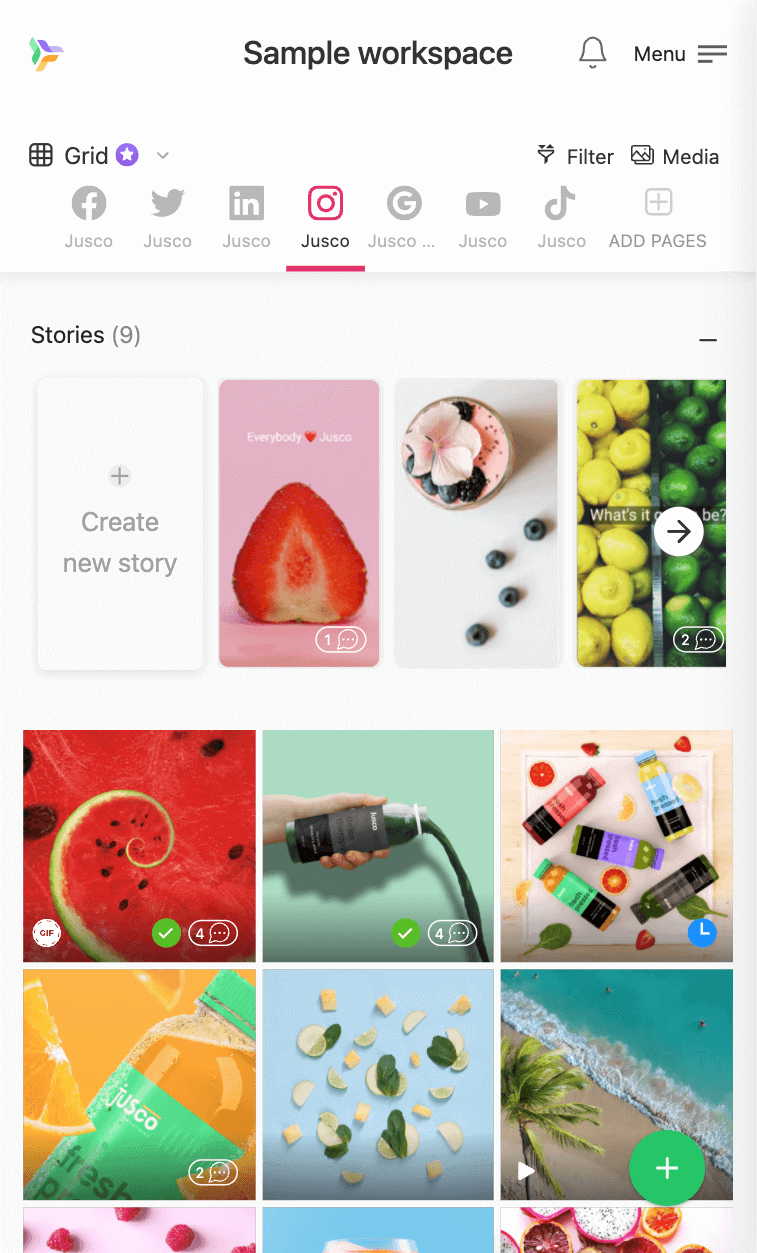
Different content views
The multiple views in Planable offer you the flexibility to view past and upcoming content in different ways. Toggle between Calendar, List, Feed, and Grid views to see all of your content at a glance across 9 different platforms and get a sense of what your content plan looks like across all your pages. The Grid and Feed views allow you to plan your Facebook and Instagram grid and feed, which is currently not possible with Meta Business Suite.
Mockups
With Planable, you can test different Facebook profile pictures and covers and get them approved by the client before they go live. You can also create mockup Facebook pages if you want to prepare a customer pitch or get more visual.
Media library
Planable’s media library allows you to see all your assets in one place and keep track of what’s been used across all platforms. This ensures you’re always on brand and saves you time. Whether it’s logos, visuals created with an icon maker, or pre-approved photos, you can easily bulk upload everything in one go and not worry about tracking down the right assets or pre-approved photos.
Giphy integration
Planable has a giphy integration that makes using GIFs easy and fun. You can spice up your scheduled posts with entertaining GIFs that will stop users from scrolling on their feed and boost interactions.
Yes! Planable makes it super easy to schedule your Facebook posts in bulk! With the bulk upload option, you can upload all your assets in one go and have them all in one place.
For example, if you receive a batch of photos from your client, you can upload all the images at once and keep track of what you’ve used and what you haven’t. Scheduling posts in bulk ensures you keep a consistent schedule and gives you better visibility over any gaps in your calendar.
Why can’t I schedule posts on Facebook?
If you can’t schedule posts on Facebook, it might be due to using a personal profile instead of a business page, a feature not being available in your region, or technical issues with the app. You can schedule posts through Meta Business Suite for business pages or use third-party tools like Planable. Ensure your account is properly set up and connected to these platforms.
Can you create recurring Facebook posts?
Yes! Planable has a useful reschedule post feature that will save you time creating individual posts. Easily create evergreen Facebook posts to increase social media engagement and stay on top of your posting strategy.
Can you schedule posts for a Facebook Group?
Yes! Planable allows you to schedule group posts in just a few clicks. And the best part is you can schedule posts for your page and your groups at the same time.
How do you plan Facebook Content in Planable?
Planable’s social media calendar makes creating content a breeze. You can choose between 4 views (feed, calendar, grid, and list) to better organize your upcoming posts. You can collaborate on content, label posts for faster search, and recycle evergreen content.
What other types of Facebook content can you schedule?
With Planable, you can schedule carousel links, add a CTA, organic targeting, location, videos, and change thumbnails.
Ready to start scheduling Facebook posts? Here’s a recap:
Posts can be scheduled using Meta Business Suite or third-party tools like Planable. You should now feel confident in your scheduling abilities, be it natively or via third-party publishing tools.
Scheduling Facebook postscan help you save time, ensure your content is published when your audience is most engaged, and help you post consistently when you’re managing multiple social media accounts at the same time.
When you schedule posts in advance, you can be more organized with your social media content calendar even if you’re not in the same time zone as your Facebook followers.
Relentless advocate and practitioner of putting users before Google algorithms since 2016. Geeks out over everything tech SEO. Dabbles in photography and is a natural-born reader.